Thanks for your support! If you make a purchase using our links in this article, we may make a commission. And, as an Amazon Associate, I earn from qualifying purchases. See the full disclosure here.
Updated April 8, 2024
When we bought our Class C RV, “Chessie,” we were so happy that we would soon be on the road RV camping. And then the roof leaks started! It rained the first weekend that we took our RV out for a shakedown trip and we noticed that we had a leak in the overcab. It turns out that this is very common for class C RVs. But then we noticed that we had a leak over the shower too!
Our used RV was 10 years old when we bought it but it had less than 9,000 miles on it. So we felt like we got a pretty good deal on it. And we did. But we had to figure out where the roof leaks were coming from and get them fixed before any lasting damage occurred to the RV.
We made several attempts to find the exact location of the leaks and then caulk those locations. Finally, after the third try, I guessed right and fixed the leak over the cab. However, the leak over the shower was still active; honestly, we were still concerned about the overcab leak.
So, I decided the best thing to do was to take the RV to our local RV Dealership and have it leak tested. I’m glad we did because they discovered leaks all over the exterior of the RV that we did not know about!
How Does Pressure Testing Work?
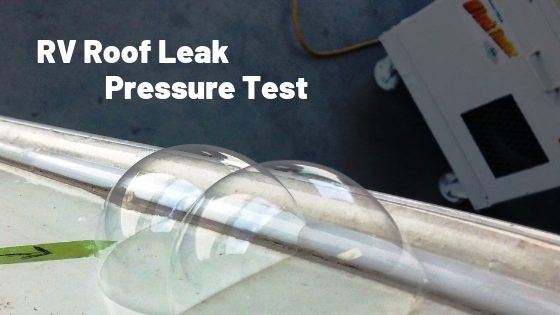
Pressure testing to find water leaks in an RV or travel trailer works by creating a higher air pressure inside the RV than the air pressure outside the RV.
The idea is to force air into the RV so the air leaks out of any crevices. The outside of the RV is sprayed with soapy water and wherever air escapes through the exterior of the RV, soap bubbles will appear. This is how leaks are located on the roof or anywhere else on the RV where water leaks are present.
When the RV repair shop does a pressure test, they have to prep the RV first to prevent air from escaping through all the places that are not leak points.
For example, they will seal off the dash air vents, the range hood vent, the sink, and the shower drains. This creates more pressure inside the RV, which causes bubbles outside the RV.
Does Pressure Testing Just Find Roof Leaks?
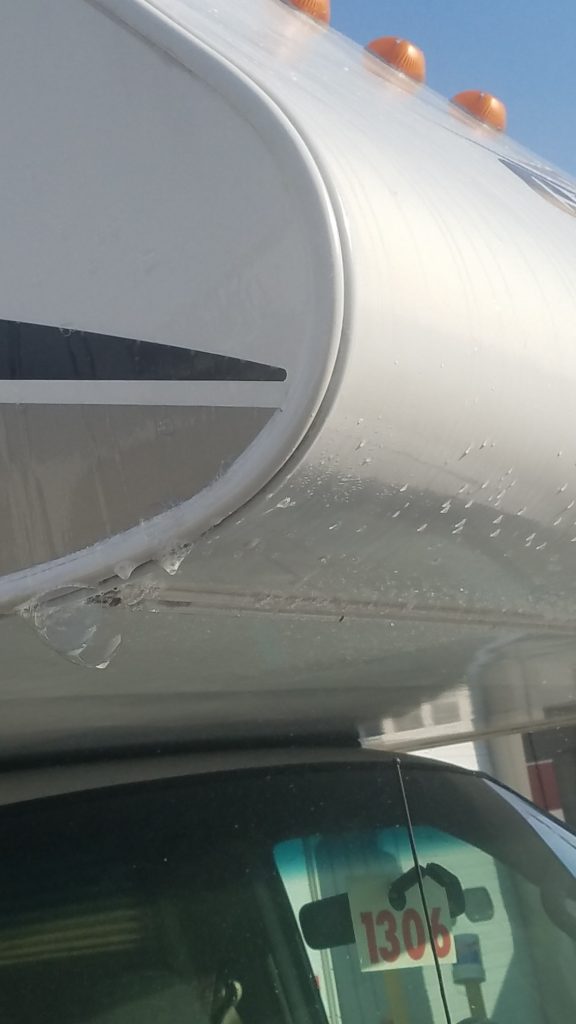
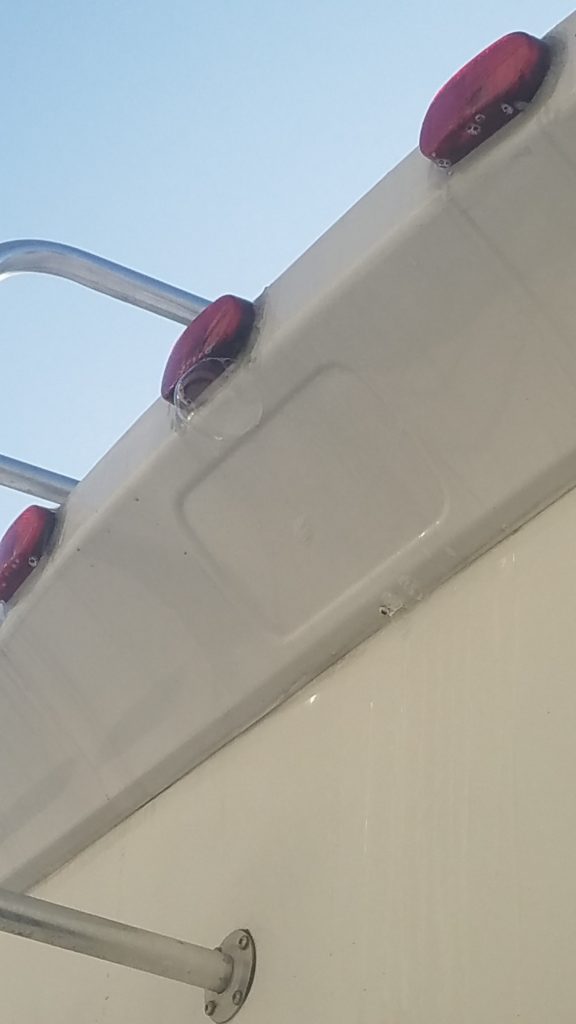
Pressure testing does find roof leaks. However, pressure testing also finds leaks along the sides of the RV. In fact, when we tested our RV, we found no roof leaks. All of the leaks were on the sides of the RV along the moldings, compartment doors, and windows.
Leaks typically occur anywhere a penetration is made through a roof or side wall. Very often, they also occur along the side wall panel joints and around an RV’s corners. Luckily, an air pressure test can find them all.
How Much Does it Cost To Pressure Test for RV Leaks?
Pressure Testing your RV, travel trailer or 5th wheel will cost anywhere from $350 to $500, depending on the size of your RV. In many cases, like at Chesaco RV, where we had our RV tested, the RV Repair Shop will apply the cost of the leak test toward the cost of repairing the leaks.
Our leak test cost $279, which seemed like a very fair price. This was our second trip to Chesaco RV. Once, we went to the Gambrills location to have the water heater replaced, and this time, we went to their Joppa location for the pressure test. On both occasions, the price and the customer service were outstanding!
Can I Pressure Test For Leaks Myself?
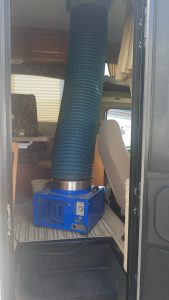
You can pressure test for leaks yourself to try to save a little money. I thought about it myself but finally figured I could not get enough pressure into my RV. If you do it yourself, you would need to figure out how to get a good seal around doors or windows where you can blow air into the RV.
You will probably need to use two or three fans and maybe even a leaf blower to get enough air pressure inside the RV. So, I decided that by the time I tried to do all of that, test it and have it fail, and then try it all again, I would be better off just letting the pros handle it.
Plus, they looked over all of the caulk on the roof and assured me it was all in good shape and needed no maintenance.
However, if you insist on a DIY pressure test, I found an article where a combination of dual fan and leaf blower setup is used to pressurize an RV. It’s worth a look.
How Much Does it Cost to Repair RV Water Leaks?
Repairing water leaks on an RV can cost anywhere from several hundred to several thousands of dollars. It all depends on what is leaking and what needs to be done to stop the leaks.
If you just need some caulking, it will cost much less than replacing a roof. So, the cost of the repairs can vary quite a bit.
The other factor that can be expensive is the cost of fixing any water damage that occurs due to the leak. You may be able to fix a leak but there is still water behind the fiberglass or aluminum that can cause damage.
If the leak has been active for a long time, you may need more extensive work to remove mold or rotten plywood to fully resolve your problem.
While water leaks can be expensive to fix, they are even more expensive not to fix. Your health could be at risk if you breathe in mold spores.
The longer you wait to fix a water leak, the more damage will need to be repaired. Inspect your vehicle often for any signs of water penetration, and jump on it quickly if you find a potential leak.
How Can I Prevent a Water Leak in My RV?
This is a great question because an ounce of prevention is better than a pound of cure – or so my dad has told me a few times. He was right, by the way.
The best way to prevent a water leak is to regularly inspect your RV for signs of water infiltration. Here are a few tips that can save you a bunch of money.
- Inspect Your Roof Regularly – Climb up on the roof when it is safe and look around for any signs of tears in the roof, cracked caulk or seam separation. Always check around the things that protrude through your roof, like plumbing vents, roof vents, the AC unit, and antennae. Check the caulk and seams for any signs of cracking. If you see something that looks like a crack, clean it and fill it with the proper caulk or roof tape.
- By the way, check out my article called Can I Walk On My RV Roof? for some useful tips about how and where to walk on your RV roof. You’re not supposed to just walk anywhere up there.
- Inspect the Exterior Walls – Check for caulk cracks along corner posts, around windows, doors, storage compartments, and lights.
- Inspect the Interior Walls – Check for soft spots, discoloration, or wrinkles on the walls, especially around doors, windows, slide-outs, and vents. Also check inside the cabinets.
- Check the Cabover – If you have a Class C RV this is a classic leak area. Feel around under the mattress pad and in all of the corners for signs of moisture.
- Check the Storage Compartments – Check for any signs of water damage or moisture inside your storage compartments. The caulk around the storage compartment doors is a likely leak spot.
- Look for Delamination – Delamination looks like the outside of your RV is bulging out. This occurs when water gets between the fiberglass or aluminum and the wood underneath. It’s a definite sign of a water leak. You can see delamination on the overcab of our Class C RV below to the right of the red arrow.
Related Questions
1. Can I Fix the Leaks Myself?
You can fix some leaks yourself. And others you should leave to the pros. If you have caulking that needs to be repaired, you could probably do it yourself, but you need to know how to do it correctly. Caulking over the old cracked caulk is just asking for another leak to occur. And you need to use the right caulk that will be able to flex and bend without cracking, or you are wasting your time.
You can also replace the thick caulk on your roof used around any roof protrusions but again, there is a right way to make all of these repairs. If you are handy and have the right experience, knowledge, tools, and materials, you can do anything yourself. If not, you can learn. Or you can let a pro get it right for you the first time.
2. What’s The Best Caulk to Use on RVs?
There are several types of caulk that can be used on RVs. Some are better on roofs, some better on seams etc. Here are a few that I have used.
I keep several caulk tubes on board my RV, so if I find a leak, I can fix it right away. I’m pretty sure that’s why I had no roof leaks when my pressure test was conducted. I didn’t do well on the rest of the RV.
- Dicor 501LSW-1 Self-Leveling Lap Sealant – Best used on RV Roofs around roof edges, air vents and air conditioners.
- Geocel 28127V Pro Flex RV Flexible Sealant – Best used on seams, around windows, doors, compartment doors and corners.
- EternaBond RSW-2-50 RoofSeal Sealant Tape – Best used for roof cracks
Thanks to Chesaco RV in Joppa, Maryland, for providing the pictures of the leak test they performed on my RV. They were great to work with!
Learn More:
– RV ROOF RESEAL COST
– Can I Use Flex Seal on My RV Roof?
– Best Sealant for RV Windows – Leakproof Your RV!
– Can You Repair Your RV Roof From The Inside?
– Does Eterna Bond Really Work at Stopping RV Roof Leaks?
Thanks for reading this article. Do you have any advice or about finding leaks by pressure testing? Please share your comments below!
If you would like to contact us directly, please feel free to visit our Contact Page and send us an email.
To see a list of all of our articles check out the Blog Archive!
Mike Scarpignato – Bio
Mike Scarpignato created RVBlogger.com over five years ago in 2018 to share all we have learned about RV camping.
Mike is an avid outdoorsman with decades of experience tent camping and traveling in his 2008 Gulf Stream Conquest Class C RV and 2021 Thor Challenger Class A motorhome.
We attend RV Shows and visit RV dealerships all across the country to tour and review drivable motorhomes and towable trailers to provide the best evaluations of these RVs in our blog articles and YouTube videos.
We are 3/4-time RVers who created RVBlogger.com to provide helpful information about all kinds of RVs and related products, gear, camping memberships, tips, hacks and advice.


This is super helpful, thank you… hope you don’t mind but I am sharing this with others in my
group (we are working on a school project and this
will help with our research).
Hi Dorthea,
I’m glad you found the article to be helpful and I am perfectly ok with you sharing it.
I hope it helps with the school project!
Mike
Every person who owns a motorhome knows that water damage can lead to costly repairs, which nobody wants to deal with. Of course, prevention is important but it doesn’t always keep the situation from happening. If the leak is small, you may be able to apply liquid roof and the problem will resolve itself.
Hi Elizabeth,
An ounce of prevention…
Thanks for your suggestion and if you know where your roof is leaking some caulking or liquid roof could be the cure. If you don’t know where the leak is coming from – which is what happened to me – then you may need to pressure test.
Best of luck!
Mike
Hi,
Being a Sealtech Leak testing tech for many years one thing I have noticed is….. Most leaks I have had to repair or address have been on one of the 4-side walls… NOT ROOFS. I know most people when they think about RV rain water leaks think ROOFS, but it can be any place where something is attached to your Rig.
Happy Trails !