Thanks for your support! If you make a purchase using our links in this article, we may make a commission. And, as an Amazon Associate, I earn from qualifying purchases. See the full disclosure here.
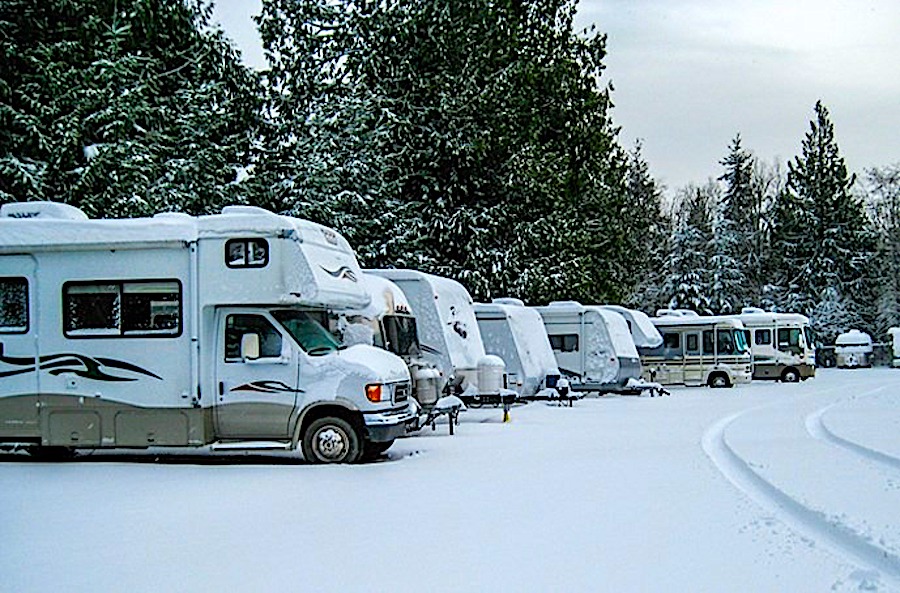
For many RVers, seasoned and beginners alike, preparing and properly storing an RV for wintertime can be a challenging process.
But, it really doesn’t have to be.
Following these 10 easy steps, you’ll have your RV in tip-top shape for winter storage in no time.
10 Tips to Prepare and Store Your RV for Winter
Here are the basic steps that we’ve learned over the years for properly storing our RV for winter:
1. Winterize the Plumbing System
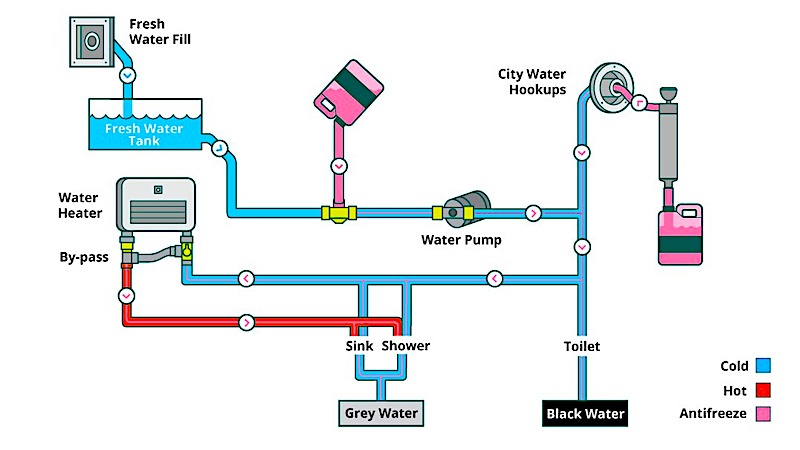
The first step to storing your RV for winter is properly winterizing the plumbing system. This consists of several steps.
Begin by removing inline water filters, bypassing, and flushing out both the gray and black holding tanks as well as the water heater. If your RV doesn’t have an in-built flushing system for the black tank, make sure to clean it out manually (with a wand).
After draining the tanks and water heater, it’s time to open up the faucets and valves. Using a water pump to push the water out can make the process quick and easy. Afterward, don’t forget to recap those faucets and drains.
Next, you will need to add antifreeze to your plumbing system. Depending on your RV this can be done via a by-pass kit or by connecting a tube/hose from the water pump (on the inlet side) to your antifreeze container.
Pressurize the plumbing system by turning on the water pump and slowly open the hot and cold valves one by one until you can see the antifreeze appear where water would normally be. You’ll want to start with the closest faucets to the water pump and work your way to the furthest ones.
Finish up this process by flushing the toilet until you see the antifreeze as well as adding a cup of antifreeze to each drain in the RV. Don’t forget to flush some antifreeze into the holding tank as well (this prevents any leftover water from freezing and damaging the tank).
2. Remove and Store Your Batteries
Removing and storing your RV batteries for the winter is the second step to preparing your RV for storage over the coldest periods of the year. Refer to your RV owner’s manual to get the precise instructions on which order to disconnect them.
After you’ve successfully removed the batteries, it is highly recommended that you charge them completely. Once removed and charged the batteries, store them in a safe and secure location that is both dry and warm (ideally, a garage, shed, or storage unit).
And that’s it for step number two. Easy peasy.
3. Add Fuel and Fuel Stabilizer
The third step to properly winterizing your RV is topping off the fuel tank and adding your preferred fuel stabilizer. That said, some folks don’t feel the need to add a stabilizer to their fuel. Rather opting to simply fill the tank completely full.
Unfortunately, with the quality of gas today, it will evaporate even if the tank is topped off to the brim. For that reason, it’s recommended that you do indeed add a fuel stabilizer before parking your RV in storage for the winter.
4. Keep the Mice Away
Keeping the rodents away from your RV during the wintertime is another essential step you’ll need to take to fully protect your rig. The damage that mice are capable of causing to an RV over the wintertime is no laughing matter. Electrical wires and components are among the most costly and common damages inflicted on rigs by these little critters.
Mice will most definitely attempt to find warm and dry shelter during the coldest parts of the year (like your empty RV). So, make sure to check the outside of the RV for any holes or entryways they might be able to find and crawl through. Removing all food from the interior of the RV will also help.
Additionally, setting traps (or poison/bait) around, under, and even inside the RV can help ward the little critters off.
5. Clean, Inspect and Seal the Exterior of the RV
The fifth step in properly storing your RV for winter is to clean, inspect, and seal the exterior of the rig. This step will also reinforce step number four (protecting your RV from rodents).
Start by washing the RV’s exterior with soap and water. This is necessary to inspect and properly seal the RV because it is practically impossible to see all of the seals on a dirty rig.
Once the outside of the RV is cleaned, take a nice, long look at the entire exterior. Focus on areas where fixtures, lights, and other components overlap or intersect with folds, sidewalls, or the roof. You are looking for any breaks or cracks in the RV’s seals.
Once you’ve identified worn out or damaged seals you’ll want to remove them. Using a putty knife or scraper of some sort is the most efficient way to do so. Afterward, clean the area again and let it completely dry.
Lastly, re-seal the RV via a caulk gun and a product such as Geocel. For the roof, products such as Dicor are preferred for sealing things up. You’ll need to give your RV at least two or three hours (up to an entire day) to completely dry after re-sealing it.
6. Choose a Safe Location
Choosing a safe location is perhaps one of the most important steps to storing your RV properly. However, this step might be one that you have little choice over, depending on your location and finances.
Many RVers keep their RVs close at hand, as in on their own property. That said, others choose safe and secure storage facilities (both indoor and outdoor spaces are available).
Whatever your situation is, make sure that your RV is stored somewhere that it is unlikely to be damaged by falling trees (or large branches), safe from the weather, and away from rodents if possible.
7. Buy the Right Camper Cover for Winter
Depending on where you will store your RV for the cold months, you may require a heavier or lighter camper cover. And, again, depending on the make and model of your rig, there may be more or fewer options available.
At any rate, before purchasing a cover to help protect your RV through the wintertime, be sure to take into consideration where your rig will be stored, how cold it will be, how exposed it will be to the weather, and any other important factors you can think of.
Another option is to store your RV under a permanent or semi-permanent shelter.
8. Protect the Tires
After performing all of the above steps, including parking and covering your RV, you’ll need to add some extra protection to your rig’s tires. Depending on where your RV is stored, the climate, and other factors, such as the brand, type, and age of your tires, this step may be more critical for some RVer owners than others.
Excessive sunlight and harmful UV rays are known to “bake” tires. Likewise, the extreme temperatures of the coldest winter days can crack the sidewalls of tires and otherwise damage your tires in general as well. Adding even the most basic RV tire covers can save you a lot of money by extending the lifespan of your rig’s tires.
So, unless your RV cover itself adequately covers and protects your tires, consider investing in a set of RV tire covers.
9. Turn Off the Propane
Turning off the propane supply to your RV is one of the last steps to properly preparing your rig for its winter storage. In most cases, this is one of the simplest steps. All you have to do is find the propane tanks and flip the shut-off valve.
Some motor homes may have toggles and valves located throughout the RV’s interior as well. And while these won’t hurt to shut off as well, do not confuse these switches for the master shut-off, which is normally always located on the propane tanks themselves (not the ones on the water heaters or other appliances).
If you’ve any experience with filling your propane tanks, you are more than likely already familiar with this main shut-off valve on the propane tank as it must be turned off while filling the tanks. If you have trouble finding the valve, refer to your propane tank manual. Many times this valve is star-shaped and easy enough to find.
10. Check on Your RV
Last but not least is checking on your RV periodically throughout the wintertime. This is absolutely necessary depending on where you’ve opted to physically store your RV. That said if your RV is parked on your property, or in a secure storage facility for RVs and boats, this step isn’t quite as crucial.
For those storing their RVs in less secure locations, such as the property of a friend or family member, or elsewhere, checking in on your rig from time to time can save you a whole lot of trouble.
The bottom line is that you never know what may be happening with your RV while it’s out of your sight. You may have overlooked one of the winterizing details, or rodents or even rowdy trouble makers may have even gained entry to your RV somehow. Checking in on it regularly will cut back on the chances of nasty surprises once spring rolls around and you return to your RV to get it operational again.
A Final Word About Preparing and Storing Your RV for Winter
Following these 10 steps to properly store your RV for winter will have your RV in the best shape possible when spring arrives. Depending on your rig and your RV lifestyle, some steps may be removed or added to these 10.
Do you know about a winterizing or storage hack for RVs that you think our audience should know about? If so, we’d love to hear all about it in the comments section below.
Good luck getting your RV adequately prepared and stored for the winter!
About the Author:
Mike Scarpignato – Bio
Mike Scarpignato founded RVBlogger.com with his wife, Susan, in 2018 to help new and experienced RVers make better decisions about buying, owning, and traveling in an RV.
Mike has decades of camping experience and has traveled extensively in both a Gulf Stream Conquest Class C and a Thor Challenger Class A motorhome. He and Susan spend much of the year on the road, attend RV shows, visit dealerships, and tour RVs across the country.
Through RVBlogger.com and the RVBlogger YouTube channel, Mike shares practical, first-hand advice about RV buying, floor plans, ownership, maintenance, gear, campgrounds, and the RV lifestyle.


More of a question, is it ok to leave your windows uncovered in the wintertime. Is the sunshine good or bad for the interior?