Thanks for your support! If you make a purchase using our links in this article, we may make a commission. And, as an Amazon Associate, I earn from qualifying purchases. See the full disclosure here.
If you’re anything like me, the first warm day hits and you start thinking…
👉 “Alright… it’s time to get the RV ready.”
But here’s the deal—de-winterizing your RV isn’t just turning on the water and heading out. If you rush it or miss a step, you can end up with leaks, broken parts, or worse.
I’ve been de-winterizing my own motorhome for the past 8 years, and I can tell you—it’s not hard… but there is a right way to do it.
The good news? Once you know the process, it becomes a simple routine you can knock out in about an hour.
Let me walk you through the exact 10 steps I follow every spring so you can do it right the first time.
Step 1: Inspect Your RV for Winter Damage
Before you touch the water system, do a full walk-around inspection. This is one of the most important parts of de-winterizing your RV because you want to catch any damage before you pressurize the system.
I always check:
- Roof (cracks, soft spots, loose sealant)
- Tires (pressure, cracks, dry rot)
- Seals around windows and doors
- Underneath for loose parts or signs of rodents
If you want a full checklist, I highly recommend using our 115 Point RV Inspection Checklist (New or Used)—it covers everything.
Also, if you haven’t looked at your roof since last season, now is a great time to clean and inspect it using these guides:
- 9 Easy Tips for Cleaning Your RV Rubber Roof
- How We Pressure Tested Our RV for Roof Leaks
- Can You Walk On Your RV Roof?
👉 Catching issues now is way easier than dealing with them mid-season.
Step 2: Reinstall Drain Plugs & Check Your Anode Rod
If you removed any drain plugs when winterizing your RV, now’s the time to reinstall them.
Most important:
- Water heater drain plug or anode rod
👉 While you’re at it, inspect the anode rod. If it’s worn down, replace it now—it protects your water heater from corrosion and can extend its life.
Just snug it up—don’t overtighten.
Step 3: Set Your Water Heater Bypass Valves Correctly
During winterizing, you likely bypassed your water heater. Now you need to reverse that.
- Turn OFF the bypass
- Allow water to flow into the tank
👉 This step is critical. If your tank doesn’t fill and you turn the heater on dry, you can damage it instantly.
Step 4: Close All Low-Point Drains
Your RV has low-point drains that were opened to remove water from the system.
Make sure:
- They’re fully closed
- Nothing is dripping underneath
👉 If these are open, your water will just run right out when you try to fill the system.
Step 5: Add Water (City Hookup or Fresh Tank)
Now it’s time to get water flowing again.
You can:
- Hook up to city water (this is what I usually do)
OR - Fill your fresh water tank and use the pump (this tests to see if your water pump survived the winter)
👉 City water makes flushing the system faster and easier.
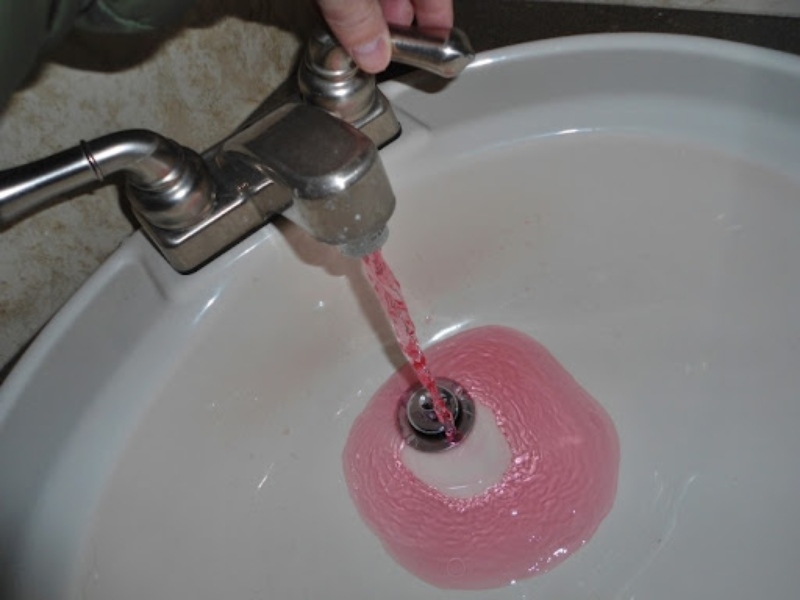
Step 6: Flush All Antifreeze from the System
Now it’s time to get rid of the pink antifreeze.
Go one fixture at a time:
- Kitchen sink (hot and cold)
- Bathroom sink
- Shower
- Outside shower (don’t forget this!)
- Toilet
👉 Run water until it goes from pink to completely clear.
Also check:
- Black tank flush connection
- Ice maker or washer hookups (if equipped)
👉 Antifreeze loves to hide—take your time here.
If you still notice a taste or smell afterward, check out our guide on How to Remove Antifreeze Taste and Smell from RV Water.
Step 7: Check or Replace Your Water Filter
If your RV has a water filter, now’s the time to replace it.
👉 Old filters can trap antifreeze and leave a bad taste in your water all season.
This is one of the most overlooked steps when de-winterizing an RV.
Step 8: Sanitize Your Fresh Water System
Even if everything looks clean, I always sanitize my system at the start of the season.
Basic process:
- Add household bleach (about 1/4 cup per 15 gallons of water)
- Fill the tank
- Run it through all faucets
- Let it sit for a few hours or overnight
👉 This kills bacteria and keeps your water safe.
For a full step-by-step breakdown, check out our article on How to Sanitize Your RV Fresh Water Tank.
Step 9: Flush Again & Test the Water Pump
Now flush the system again until you no longer smell bleach.
Then test your water pump:
- Turn it on using the fresh tank
- Let it pressurize
👉 It should shut off and stay off.
If it keeps running or cycles:
- You may have a leak
- Or air in the system
Also test your toilet seal:
- Add water to the bowl and let it sit
👉 If it drains out, the seal may need attention.
Step 10: Check for Leaks & Turn On Your Water Heater
Now do a final inspection while everything is pressurized:
- Under sinks
- Around the pump
- Behind the water heater
- Along visible plumbing lines
👉 Even a small drip now can turn into a big repair later.
Once everything checks out:
✔ Turn on hot water at a faucet
✔ Make sure it flows steadily (this confirms the tank is full)
Then turn on your water heater (electric and/or propane).
👉 Never turn it on unless the tank is full.
5 Mistakes to Avoid When De-Winterizing Your RV
After doing this for years, these are the mistakes I see most often:
Mistake #1: Forgetting the Outside Shower
This is the #1 place antifreeze hides.
👉 If you skip it, you’ll find out later the hard way.
Mistake #2: Turning On the Water Heater Too Soon
If the tank isn’t full, you can destroy the heating element in seconds.
👉 Always confirm water is flowing before turning it on.
Mistake #3: Skipping the Water Pump Test
Everything might look fine on city water—but the pump tells the real story.
👉 If it keeps running, something’s wrong.
Mistake #4: Not Replacing the Water Filter
Old filters can ruin your water taste for the entire season.
👉 Replace it now and save yourself the headache.
Mistake #5: Rushing the Flush Process
Antifreeze can linger in your lines longer than you expect.
👉 Take your time and run every fixture thoroughly.
Final Thoughts
De-winterizing your RV isn’t complicated—but doing it right makes a huge difference.
If you follow these 10 steps and avoid the common mistakes:
- You’ll prevent costly repairs
- You’ll have clean, safe water
- And you’ll be ready to hit the road with confidence
For me, this is always the moment the RV season officially begins.
You hear the water flowing again, everything checks out… and you know it’s time to start planning that first trip.
Quick Checklist (Save This)
- Inspect RV
- Reinstall plugs & check anode rod
- Set water heater valves
- Close low-point drains
- Add water
- Flush antifreeze
- Replace water filter
- Sanitize system
- Flush again & test pump
- Check leaks & turn on heater
Mike Scarpignato – Bio
Mike Scarpignato founded RVBlogger.com with his wife, Susan, in 2018 to help new and experienced RVers make better decisions about buying, owning, and traveling in an RV.
Mike has decades of camping experience and has traveled extensively in both a Gulf Stream Conquest Class C and a Thor Challenger Class A motorhome. He and Susan spend much of the year on the road, attend RV shows, visit dealerships, and tour RVs across the country.
Through RVBlogger.com and the RVBlogger YouTube channel, Mike shares practical, first-hand advice about RV buying, floor plans, ownership, maintenance, gear, campgrounds, and the RV lifestyle.