Thanks for your support! If you make a purchase using our links in this article, we may make a commission. And, as an Amazon Associate, I earn from qualifying purchases. See the full disclosure here.
Homemade RV Awning Cleaner and Cleaning Tips
Ask any experienced RVer and they’ll tell you: keeping your RV awning clean is a constant battle. Dirt, mildew, and grime seem to show up overnight — especially after a rainy trip or long period of storage. But the good news is, you don’t need expensive commercial cleaners to get the job done.
In this updated guide, we’ll walk you through the best homemade RV awning cleaner recipes, specific care tips for vinyl vs. fabric awnings, and how to protect your awning after cleaning to keep it looking like new.
Let’s roll out the tips and get that awning sparkling again!
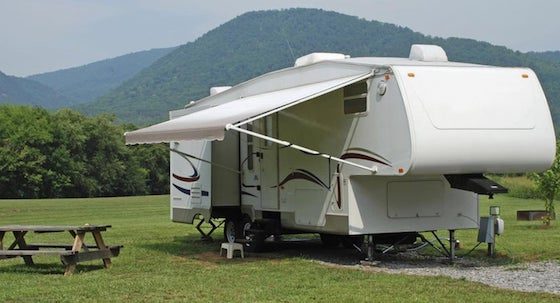
🛠 What Type of Awning Do You Have?
Before you mix up a DIY cleaner, it’s important to know your awning material. RV awnings are typically made from either vinyl or acrylic fabric (often by brands like Sunbrella). Each material has different cleaning and care requirements.
Fabric Awnings (Acrylic/Canvas)
- Breathable and quick-drying
- UV-resistant
- Water-repellent (not waterproof)
- Requires reapplication of water repellents like 303 Fabric Guard
Vinyl Awnings
- Mold and mildew-resistant (but not immune)
- Common in humid regions
- Requires UV protection products like 303 Aerospace Protectant
🧽 DIY RV Awning Cleaner Recipes
Here are our top tested and RVer-approved homemade cleaner recipes. Each one is made from affordable, easy-to-find household ingredients:
Recipe #1: Basic Vinegar Cleaner (Vinyl or Fabric)
- 1 gallon warm water
- 1 quart white vinegar
Great for light dirt, mildew prevention, and regular cleanings.
Recipe #2: Vinegar + Dawn Boost (Vinyl or Fabric)
- 1 gallon warm water
- 1 quart white vinegar
- 1 squirt Dawn dish soap
Cuts through greasy residue and tough stains.
Recipe #3: Hydrogen Peroxide Mildew Buster (Vinyl Only)
- 6 parts water
- 1 part hydrogen peroxide
Avoid using on fabric; great for mildew spots on vinyl.
Recipe #4: Heavy-Duty Paste (Vinyl or Fabric)
- 2 parts grated Fels-Naptha soap
- 1 part Borax
- 1 part Washing Soda
- Hot water (enough to create a thick, spreadable paste)
Ideal for serious grime. Store leftovers in a sealed container.
Recipe #5: Fabric Spot Treatment
- Baking soda + water = paste
Use gently with a sponge to clean and brighten fabric awnings.
🚫 A Note on Bleach:
Some RVers still swear by bleach, but we recommend using it sparingly — no more than once a year. It can weaken stitching and fade color, especially on fabric awnings. If you use bleach, test a hidden area first.
🧼 How to Clean Your RV Awning: Step-by-Step
Step 1: Prep Your Gear
What you’ll need:
- Long-handled soft-bristle brush or push broom
- Soft sponge or cloth
- Bucket or spray bottle
- Garden hose with spray nozzle
- Gloves, protective eyewear, and a mask (especially for mold cleaning)
Step 2: Inspect Your Awning
Before cleaning:
- Check for loose bolts, tears, or sagging
- NEVER remove awning end caps (spring-loaded = danger)
- Extend the awning fully and stabilize it
Step 3: Soak and Scrub
- Spray down the awning with water on both sides
- Apply your homemade cleaner evenly with a spray bottle or brush
- Let it soak for 10–30 minutes (depends on grime level)
- Gently scrub trouble spots — especially creases and corners
Step 4: Rinse and Dry
- Angle one side of the awning downward to allow runoff
- Rinse thoroughly with a hose until all residue is gone
- Leave the awning fully extended until it’s 100% dry to prevent mildew
💡 Tip: Use a step ladder for high or hard-to-reach areas. Cleaning can be physically demanding — don’t hesitate to hire a pro if needed!
🛡 Protect Your Awning After Cleaning
Cleaning is only half the battle — protection is the key to long-term awning health. After your awning is clean and dry, apply the correct protectant based on the material:
✅ For Fabric Awnings:
- Restores water repellency
- Shields against mold, UV rays, and stains
- Keeps fabric feeling soft and breathable
✅ For Vinyl Awnings:
- Protects against UV damage and fading
- Prevents cracking, dust buildup, and stains
- Leaves a non-greasy, like-new finish
Never use silicone or oil-based sprays on fabric awnings — they can damage the fibers and reduce breathability.
🧼 Bonus Cleaner Tips for Best Results
- Always clean on a warm, dry day for best drying and product performance
- Avoid high-pressure washing, which can damage the awning or its waterproofing
- For stubborn mold, repeat cleaning or use a toothbrush for crevices
- Don’t roll up a damp awning — this traps moisture and causes mold
- Reapply fabric or vinyl protectant every 6–12 months
Final Thoughts: A Happy Awning = A Happy Camper
With the right approach, tools, and one of these homemade RV awning cleaners, you can save money, extend the life of your awning, and improve the look of your entire RV setup. Cleaning your awning might not be your favorite RV task, but it’s well worth the effort.
And trust us — the next time you roll into a campsite and unfurl a clean, mildew-free awning, you’ll be glad you put in the work.

Thanks for all the tips just purchased my first RV. I plan on using your cleaning recipe and have been reading up on the 303 protectant.
Hi Aimee,
Glad you like the tips and good luck with your new RV!
Mike
Mike and Susan your blog is extremely Fabulous and informative for us. The article about Homemade RV Awning Cleaner is good.
Thanks Peter!
Glad you liked the article!
Mike
Thank you for explaining that when you clean an awning, you will need a push broom and a sponge. My sister is planning on getting an awning for her RV soon, but I don’t think she knows how to clean it. I will be sure to forward this article to her so that she can know what to do with it.
Hi Sandra,
Thanks for reading the article and commenting! I think you are our number one fan!
Mike