
Thanks for your support! If you make a purchase using our links in this article, we may make a commission. And, as an Amazon Associate, I earn from qualifying purchases. See the full disclosure here.
Published October 12, 2023 | Last updated July 31, 2026
If your RV air conditioner is running but the RV still does not feel cold enough, start with airflow and cleanliness before assuming the A/C unit is failing.
I recently cleaned both rooftop A/C units on our Class A motorhome. The evaporator coils were dusty, there was debris under the shrouds, and the fan blades and interior surfaces needed a good cleaning.
The job took me about two hours for both units. Afterward, the air coming from the vents felt colder.
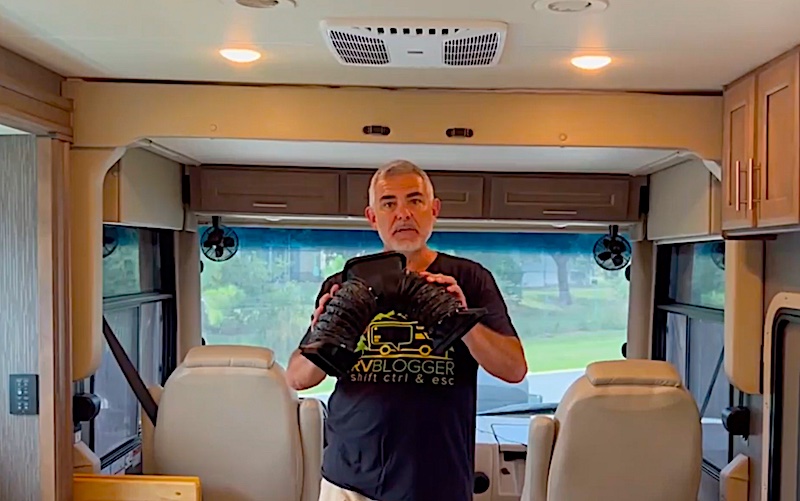
Cleaning made the air colder, but the biggest airflow improvement we have made came from installing the Kool RV A/C Connect in both units. It directs more of the conditioned air into the ceiling ducts instead of letting it leak and swirl around inside the plenum.
Those two jobs solve different problems. Cleaning helps the A/C exchange heat properly. Improving the duct connection helps more of that cold air reach the vents.
Why Your RV A/C May Not Feel Cold Enough
An RV air conditioner can be running normally and still struggle to keep the RV comfortable.
The problem may be one issue or several small issues working together:
- Dirty return-air filters
- Dusty evaporator or condenser coils
- Debris around the rooftop unit
- Dust buildup on the fan blades
- Cold air leaking inside the ceiling plenum
- Loose or poorly sealed duct connections
- Low campground voltage
- Extreme outside heat and direct sun
- Too much heat entering through the windshield, windows, roof, and slideouts
- A mechanical or electrical problem
I would work through the simple airflow and maintenance issues first. They are cheaper to correct, and they can make a noticeable difference.
1. Clean the RV A/C Filters First
The return-air filters are the easiest place to start.
When the filters fill with dust, pet hair, pollen, or campground dirt, the A/C cannot pull air through the system as easily. That reduces airflow and can contribute to the evaporator coil icing up.
Remove the filters and either clean or replace them according to the A/C manufacturer’s instructions.
I would check them frequently during heavy summer use. If you have pets or camp in dusty areas, they may need attention much more often than you expect.
2. Clean the Rooftop A/C Coils
Cleaning the rooftop coils is a bigger job, but it made the air from our units noticeably colder.
Each of our rooftop A/C units has two coils that needed cleaning:
- The evaporator coil absorbs heat from the air inside the RV.
- The condenser coil releases that heat outside.
Dust and debris act like insulation on those coils. The unit may still run, but it cannot transfer heat as effectively.
Coleman-Mach recommends cleaning the outside condenser coil at least once a year. I plan to clean ours every spring from now on and more often if we spend time in dusty locations.
How I Cleaned Both A/C Units on Our Class A
I watched this video before starting the job:
Then I cleaned our two units using the following process:
- I turned off power to the A/C units and made sure they could not start while I was working.
- I carefully climbed onto the roof and removed both lightweight rooftop shrouds.
- I covered the openings and nearby electronics with old towels.
- I used canned air to blow away loose debris.
- I brushed the coils with the built-in brush on the cleaner’s cap.
- I sprayed the coil cleaner and let it dissolve the dirt.
- I sprayed the coils a second time.
- I gently rinsed the coils with water from a spray bottle.
- I wiped down the fan blades, the interior surfaces, and the inside of each rooftop shroud.
- I allowed everything to dry and reinstalled the shrouds.
I used one can of RV A/C coil cleaner per rooftop unit. That was enough to clean both coils in each A/C twice.
The built-in brush on the lid was convenient because I did not need to carry a separate coil brush onto the roof.
Always follow the instructions on your cleaner and in the manual for your exact A/C unit. Some products are rinse-free, while others require rinsing. Protect the electrical components and do not flatten the delicate coil fins.
What I Would Do Differently Next Time
The hardest part of this job was spending so much time on my knees.
I normally use a foam board when I work on the RV roof, but I forgot it. I ended up kneeling on a folded towel. It worked, but it was not ideal.
Next time, the foam kneeling board is going onto the roof before I start.
I would also avoid doing this job on a windy day. The rooftop shrouds are extremely light. A strong gust could easily send one sliding or flying off the motorhome.
If the wind picked up, I would lower the shrouds to the ground rather than leave them loose on the roof.
DIY Cleaning Saved Us Money
We had both A/C units professionally cleaned by an RV technician about two years ago. That service cost us $300.
This time, I spent about two hours doing the work myself and used two cans of cleaner.
I am not saying every RV owner should climb onto the roof. If you are uncomfortable with ladders, unsure whether your roof is walkable, or not confident working around electrical components, hire a qualified RV technician.
But for someone who can safely access the roof and follow the manufacturer’s instructions, this is a realistic maintenance job that can save a few hundred dollars.
3. Improve Airflow With the Kool RV A/C Connect
Cleaning the coils helps the A/C produce colder air. But that cold air still has to reach the RV’s ceiling vents.
Many ducted RV A/C systems blow conditioned air into an open plenum before it enters the ceiling ducts. Air can leak through gaps, mix with return air, or swirl around instead of flowing efficiently into the ductwork.
We installed the Kool RV A/C Connect on both A/C units in our Thor Challenger.
The difference in airflow through our ceiling ducts was substantial. We also had much less cold air leaking inside the plenum.
The A/C Connect does not make a dirty or broken air conditioner healthy. It improves how the cold air is directed into the ducts. That is why I see cleaning and airflow improvement as complementary—not competing—solutions.
Kool RV makes different versions for specific Coleman-Mach, Dometic, GE, and other A/C configurations. Use the compatibility information on the product page and make sure you select the correct system for your ceiling assembly.
4. Seal Leaks Around the Plenum and Ducts
If your A/C has weak airflow, remove the interior ceiling cover and inspect the plenum with the power turned off.
Look for:
- Gaps around the duct openings
- Loose foil tape
- Torn or collapsed duct material
- Openings that allow cold supply air to mix with warm return air
- Poorly aligned ceiling ducts
Use an HVAC-rated foil tape or the materials recommended by the A/C or RV manufacturer. Ordinary cloth duct tape can dry out and fail in the heat.
5. Check Your Campground Voltage
Low campground voltage can make an RV air conditioner run poorly and may damage the compressor.
This often happens in crowded campgrounds during hot weather when many RVs are running their A/C units at the same time.
I use a full electrical management system rather than a basic surge-only protector. A quality EMS can monitor voltage and disconnect the RV when incoming power becomes dangerously low or high.
If the A/C sounds strained, repeatedly trips a breaker, or behaves differently at one campground than another, check the incoming voltage before blaming the rooftop unit.
6. Reduce the Heat Entering Your RV
Even a perfectly maintained A/C can struggle if the RV is absorbing heat faster than the unit can remove it.
These steps can help:
- Park so the afternoon sun hits the smallest side of the RV when possible.
- Use reflective insulation or insulated shades in the windshield and large windows.
- Close shades on the sunny side before the interior heats up.
- Extend the awning when weather conditions allow.
- Cook outside or use smaller appliances instead of the oven during extreme heat.
- Keep doors closed and avoid unnecessary trips in and out.
- Use fans to circulate cold air into warmer areas.
- Start cooling the RV before the interior becomes extremely hot.
It is much easier for an RV A/C to maintain a reasonable temperature than to recover after the interior has baked in the sun all afternoon.
7. Make Sure the Condensate Can Drain
While you have the rooftop shroud removed, inspect the drain pan and condensate paths.
Dirt, algae, insects, and debris can block drainage. Standing water can create odors, leaks, corrosion, and excess moisture around the unit.
Clear debris carefully and follow the manufacturer’s instructions. Do not poke sharp tools into drain lines or near the coils.
8. Inspect the Shroud, Fan, and Coil Fins
The rooftop shroud protects the A/C and helps control airflow through the condenser.
Inspect it for cracks, missing screws, and damage. Clean leaves, nests, and debris from underneath it.
Check the fan blades for dust buildup and damage. A dirty blade can move less air and create vibration.
Also inspect the aluminum coil fins. If they are badly bent, airflow can be restricted. A fin comb may help, but the fins are delicate. Work slowly or hire a technician if you are unsure.
9. Do Not Confuse Air Temperature With Room Temperature
You may have heard that an RV A/C should keep the interior 20 degrees cooler than the outside temperature. That is not a reliable rule.
The more useful test is the temperature difference between the warm return air entering the A/C and the cooled supply air leaving it.
A temperature drop in the general neighborhood of 15 to 20 degrees is often considered normal, but the correct range depends on humidity, airflow, the specific unit, and operating conditions.
For example, if the air entering the return is 85 degrees and the supply air is 65 to 70 degrees, the A/C may be doing its job even if the RV interior is still too warm because of direct sun, poor insulation, air leaks, or an undersized cooling system.
10. Know When Cleaning Will Not Fix the Problem
Cleaning and sealing can improve a healthy A/C, but they will not repair a failed component.
Call a qualified technician if you notice:
- The compressor will not start
- The breaker repeatedly trips after other electrical problems are ruled out
- The fan does not run or makes grinding noises
- The coil repeatedly freezes despite clean filters and good airflow
- There is a burning smell
- Wiring or electrical parts appear damaged
- The return-to-supply temperature difference remains very small
- The unit leaks water inside after the drain and installation seal are checked
How Often Should You Clean an RV A/C?
Our units had been professionally cleaned two years earlier, and they were overdue.
From now on, I plan to clean them every spring. I will also inspect them more frequently after camping in dusty or debris-filled locations.
My practical schedule is:
- Return-air filters: inspect regularly during the cooling season and clean whenever visibly dirty.
- Rooftop coils and internal components: inspect and clean each spring.
- After dusty camping: inspect sooner rather than waiting for the annual cleaning.
- Professional service: when the unit has an electrical, mechanical, refrigerant, or persistent performance problem.
My Bottom Line
If your RV A/C is not cold enough, do not jump straight to replacing the unit.
Start by cleaning the filters, coils, fan blades, shroud, and drain area. Then inspect the plenum and duct connections for lost airflow.
Cleaning our two rooftop units took me about two hours and made the air feel colder. Installing the Kool RV A/C Connect made the bigger difference in airflow through our ceiling vents and reduced leakage inside the plenum.
The best results came from doing both: help the A/C produce cold air efficiently, then make sure that air actually reaches the RV.
Related Reading:
- Can I Run the RV A/C While Driving?
- RV Window Insulation Tips for Summer and Winter
- Can I Walk on My RV Roof?
- Will RV Skirting in Summer Keep Your RV Cool?
Mike Scarpignato – Bio
Mike Scarpignato founded RVBlogger.com with his wife, Susan, in 2018 to help new and experienced RVers make better decisions about buying, owning, and traveling in an RV.
Mike has decades of camping experience and has traveled extensively in both a Gulf Stream Conquest Class C and a Thor Challenger Class A motorhome. He and Susan spend much of the year on the road, attend RV shows, visit dealerships, and tour RVs across the country.
Through RVBlogger.com and the RVBlogger YouTube channel, Mike shares practical, first-hand advice about RV buying, floor plans, ownership, maintenance, gear, campgrounds, and the RV lifestyle.