Thanks for your support! If you make a purchase using our links in this article, we may make a commission. And, as an Amazon Associate, I earn from qualifying purchases. See the full disclosure here.
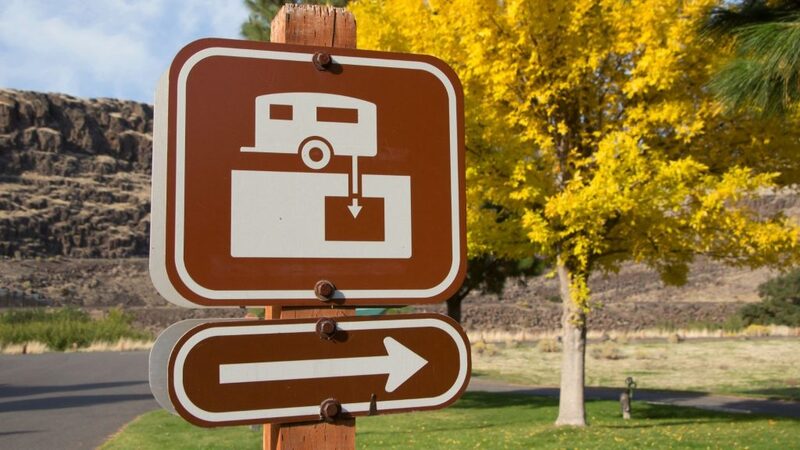
Pulling up to an RV dump station can be stressful when you are new to RVing.
You are trying to remember which valve to open first, where the rinse hose connects, and whether you packed everything you need. Meanwhile, there may be a line of RVs behind you, and it feels like every person in that line is watching.
I remember that feeling.
The good news is that dumping your RV tanks is not difficult once you have a routine. The trick is to organize your gear, do everything in the correct order, and save the extra cleaning for times when you are not holding up other campers.
These are the same five steps Susan and I use to make the process fast, clean, and much less stressful.
Watch Our 5 RV Dump Station Tips for Beginners
In this video, I walk through our complete dump-station routine and show the gear we use.
The video was filmed with our Class C, but the basic order is the same for a travel trailer, fifth wheel, Class A, or other RV with black and gray holding tanks.
1. Organize Your Sewer Gear Before You Reach the Dump Station
The easiest way to move quickly at a dump station is to keep all your sewer gear together.
I store our fittings, gloves, rinse equipment, and related gear in one dedicated container. When I pull up, I know exactly where everything is. I am not opening five compartments and searching for one missing adapter while people wait behind me.
At a minimum, I recommend having:
- A durable RV sewer hose
- A clear elbow or clear sewer fitting
- Disposable nitrile gloves
- A dedicated non-potable rinse hose
- A sewer connection adapter
- Paper towels and hand sanitizer
- A kneeling pad if getting down on your knees is uncomfortable
I use the RhinoFLEX 15-Foot Complete RV Sewer Hose Kit. I like having a clear fitting because I can see when the tanks are finished draining and when the rinse water is running relatively clear.
I also use GLOVEWORKS nitrile gloves. The textured surface makes it easier to grip slippery plastic sewer fittings, and the gloves are much tougher than the thin disposable gloves I used in the past.
Keep your freshwater equipment completely separate from your sewer equipment.
Our potable water hoses are white. Our sewer rinse hose is a different color, so there is no chance of grabbing the wrong one. I would never connect our drinking-water hose to a sewer fitting, tank rinser, or dump-station rinse faucet.
2. Connect the Sewer Hose and Dump the Black Tank First
Put on your gloves before touching any sewer equipment.
Remove the cap from the RV sewer outlet carefully. Before connecting the hose, make sure both the black and gray tank valves are fully closed.
Connect the sewer hose securely to the RV. Then connect the other end to the dump-station inlet. Make sure the connection is secure enough that the hose will not jump loose when waste starts flowing.
Once everything is connected, open the black tank valve first.
The black tank contains toilet waste, so it should always be dumped before the gray tank. Let it drain completely, then close the black tank valve.
Do not open both valves at the same time. You want to control the flow and keep gray water available for the next step.
I also recommend standing where you can reach the valve quickly. This is not the time to walk away, start another job, or get distracted.
3. Dump the Gray Tank Second
After the black tank has finished draining and its valve is closed, open the gray tank valve.
The gray tank contains water from sinks and showers. It is not clean water, but it usually contains far less waste than the black tank.
Dumping it second helps rinse some of the black-tank residue from the inside of the sewer hose.
Let the gray tank drain completely, then close the gray tank valve.
This is one reason I usually keep both tanks closed while camping for a weekend. I want enough gray water available to rinse the hose after dumping the black tank.
For a longer stay with a full sewer hookup, we may leave the gray tank open. But I close it a day or two before dumping the black tank so we can collect enough gray water to rinse the sewer hose afterward.
4. Rinse the Hose and Flush the Tanks When Time Allows
After dumping both tanks, rinse the sewer hose with the dump station’s non-potable rinse water when it is available.
Never assume that faucet provides drinking water. Dump-station water is usually intended only for cleaning sewer equipment.
If there is a long line behind you, rinse the hose, pack up, and move along. A busy Sunday morning is not the time to perform a long black-tank deep cleaning.
If nobody is waiting, you can take a little more time to flush the black tank.
Many newer RVs have a built-in black-tank rinse connection. If yours does, you may not need an external backflushing attachment for routine black-tank rinsing.
However, built-in rinse ports are normally connected only to the black tank. They usually do not rinse the gray tank.
Our older Class C did not have a built-in rinse, so we used a RhinoBlaster with a gate valve. It connects at the sewer outlet and lets us backflush the plumbing and rinse either tank from the outlet side.
I specifically prefer the RhinoBlaster version with the gate valve. The valve gives you more control over the rinse process. It can also help when you want to send rinse water toward a gray tank that has no built-in rinse system.
But you need to use any flushing system carefully.
Never walk away while water is entering a holding tank.
Do not rely completely on the tank monitor either. RV tank sensors are notorious for giving inaccurate readings when waste or soap residue sticks to them. Stay with the RV, watch the process, and do not risk overfilling the tank.
If you are unsure how your built-in rinse or backflush attachment works, follow the RV and equipment manufacturers’ instructions before using it.
5. Close Every Valve, Cap the Outlet, and Sanitize Your Hands
Before disconnecting anything, confirm that both the black and gray tank valves are completely closed.
Then disconnect the sewer hose carefully, rinse it as needed, install the end caps, and return it to its dedicated storage area.
Replace the cap on the RV sewer outlet.
This final valve check matters. Leaving a valve partially open can cause leaks, odors, or a nasty surprise the next time you remove the sewer cap.
Once everything is stored, remove your gloves without touching the contaminated outside surface with your bare hands.
I keep a simple sanitation station near the rear door of the RV with:
- Fresh disposable gloves
- Hand sanitizer
- Paper towels
That little setup saves time because I do not have to search for cleanup supplies after handling sewer equipment.
Do You Need a RhinoBlaster if Your RV Has a Built-In Tank Rinse?
Maybe not.
If your RV has an effective built-in black-tank rinse, that system may be all you need for routine black-tank maintenance.
Connect a dedicated non-potable hose to the rinse port, keep the black valve open unless your manufacturer specifically instructs otherwise, and follow the instructions for your RV.
The advantage of the built-in system is that spray nozzles inside the black tank can help loosen waste from the walls and bottom of the tank.
The limitation is that the connection usually serves only the black tank.
A RhinoBlaster can still be useful when:
- Your RV has no built-in black-tank rinse
- You want to backflush from the sewer outlet
- You want the ability to rinse the gray-tank plumbing
- You want a clear fitting that lets you monitor what is draining
- You need an extra gate valve at the sewer outlet
I would not tell every RV owner that they must buy one. Check what your RV already has before adding more equipment.
Use the Right Tank Treatments Between Dumping
Dumping correctly is only part of holding-tank maintenance.
You also need enough water in the tanks and a good treatment that helps control odors and keeps waste from building up.
We use the Liquified RV line for our holding tanks:
- Liquified RV Tank Treatment for regular black-tank treatment between dumps
- Liquified Tank and Sensor Cleaner when the tank or sensors need a deeper cleaning
- Liquified Gray Tank Treatment to help manage gray-tank odors and buildup
A tank treatment does not replace proper dumping, rinsing, and water use. It works as part of the complete routine.
One of the biggest mistakes new RV owners make is trying to conserve too much water in the black tank. Waste needs enough water to break down and flow out. A dry black tank is how you end up with hardened waste and the dreaded poop pyramid.
After dumping, add the amount of water and treatment recommended for your tank and the product you are using.
RV Dump Station Etiquette That Keeps the Line Moving
You do not need to panic when people are waiting behind you. Just be prepared and avoid doing work that could have been completed somewhere else.
Before pulling into the dump station:
- Put on or set out your gloves
- Know where your sewer hose and fittings are stored
- Remove unnecessary cargo blocking the sewer compartment
- Have your rinse hose ready
- Make sure the tanks contain enough liquid to dump effectively
At the station, focus on dumping and rinsing.
Do not wash the entire RV, reorganize storage compartments, or perform a 30-minute tank cleaning when a line is waiting.
If the tanks need a longer flush, do it at a full-hookup campsite, at home where permitted, or at a dump station during a quiet time.
Preparation is what makes you fast. Rushing is what causes mistakes.
Common RV Dumping Mistakes to Avoid
Most dump-station disasters come from a few preventable mistakes:
- Opening a valve before the sewer hose is securely connected
- Dumping the gray tank before the black tank
- Using a drinking-water hose for sewer cleanup
- Forgetting to close a valve before removing the cap
- Walking away while a tank is being flushed or filled
- Trusting inaccurate tank sensors without monitoring the process
- Overfilling a tank during flushing
- Failing to secure the hose at the dump-station inlet
- Taking too long when other RVers are waiting
- Using too little water in the black tank between dumps
Slow down enough to do each step correctly. Once the routine becomes familiar, you will naturally get faster.
Our RV Dump Station Checklist
- Put on gloves and organize the sewer equipment.
- Confirm both tank valves are closed.
- Connect the sewer hose securely at both ends.
- Open the black tank valve and let it drain.
- Close the black tank valve.
- Open the gray tank valve and let it drain.
- Close the gray tank valve.
- Rinse the hose.
- Flush the tanks only when time and equipment allow.
- Confirm both valves are fully closed.
- Disconnect and cap the sewer hose.
- Replace the RV sewer outlet cap.
- Store the gear and sanitize your hands.
Follow that order and you will avoid most of the problems beginners worry about.
Final Thoughts
The dump station feels intimidating the first few times because the equipment is unfamiliar and you know other campers may be waiting.
But it becomes routine quickly.
Keep your equipment together. Dump black first and gray second. Use a dedicated rinse hose. Flush only when you have time. Close both valves before packing up. Then clean your hands and hit the road.
The goal is not to set a speed record.
The goal is to be prepared enough that you can work safely, avoid a mess, and keep the line moving.
Related Reading
How to Flush and Clean RV Holding Tanks
What Are RV Holding Tanks and How Do They Work?
How to Clean and Store an RV Sewer Hose
How to Find RV Dump Stations Near You
Mike Scarpignato – Bio
Mike Scarpignato founded RVBlogger.com with his wife, Susan, in 2018 to help new and experienced RVers make better decisions about buying, owning, and traveling in an RV.
Mike has decades of camping experience and has traveled extensively in both a Gulf Stream Conquest Class C and a Thor Challenger Class A motorhome. He and Susan spend much of the year on the road, attend RV shows, visit dealerships, and tour RVs across the country.
Through RVBlogger.com and the RVBlogger YouTube channel, Mike shares practical, first-hand advice about RV buying, floor plans, ownership, maintenance, gear, campgrounds, and the RV lifestyle.