Thanks for your support! If you make a purchase using our links in this article, we may make a commission. And, as an Amazon Associate, I earn from qualifying purchases. See the full disclosure here.
Thinking about adding an RV solar panel system to your motorhome or travel trailer but don’t know where to start? We understand. RV Solar panel power systems are a complex topic – it can be a little intimidating. There’s a lot to understand like wattages, types of RV solar panels, and the installation process. We’ll cover all that and more in our beginner’s guide to RV solar panels.
Let’s get started by talking a little bit about the science behind RV solar panels and how they work.
RV Solar Panel Basics: How Do They Work?
First thing’s first: how does an RV solar panel even make electricity (Don’t worry – you don’t have to be an electrical engineer to get the basic idea)?
The sun is constantly bombarding our planet with energy. In fact, it provides enough power to fill our entire planet’s energy needs 10,000 times over!
Using an RV solar panel, we can collect some of that energy and put it to use. A solar panel is actually made of several smaller solar cells. These cells aren’t very powerful on their own, but when combined together, they collect a significant amount of power.
You can think of a solar cell as a layered “sandwich,” where each thin layer is made out of silicon. The top layer has extra electrons that have a negative charge; the bottom layer has fewer electrons. This difference in charge creates an electrical field.
When sunlight hits the top layer of the cell, one of those extra electrons “jumps” free. Then the free-electron flows through the electrical field to a conductive metal plate. This plate collects the electrons and transfers them into the wires.
BOOM! You have electricity. From here, the electricity is stored in your RV batteries with the help of a charge controller. Filled up with solar power, your batteries power your RV.
But not all RV solar panels are created equal. There are actually a few different solar panel technologies available.
Types of RV Solar Panels
When you’re shopping for RV solar panels, you’ll notice two different kinds: monocrystalline and polycrystalline. Either one can be a great choice for RVers, but there are some important differences between them.
Monocrystalline RV Solar Panels

Like the name implies, monocrystalline panels are made out of one single silicon crystal. Or more accurately, a “slice” or “wafer” cut from a single huge silicon crystal. You’ll know when you’re looking at a monocrystalline panel because the cells will be black and octagonal.
Monocrystalline panels are the most efficient solar panels out there. They’ve got efficiency ratings between 15% and 20%. In other words, 15-20% of the sunlight hitting the panels converts to electricity.
This electrical efficiency also allows them to be slightly more compact than other panels. So, they’re also the most space-efficient option.
Polycrystalline RV Solar Panels
With a polycrystalline panel, instead of one big crystal, you have a bunch of smaller crystals melted together. These panels are recognizable by their blue, rectangular cells.
Polycrystalline panels are cheaper than monocrystalline panels, but they’re also less efficient. They’re only 13-16% efficient, compared to the 15-20% of a monocrystalline panel.
This lower efficiency isn’t the end of the world. In fact, a polycrystalline panel can still fulfill your power needs. Going with a polycrystalline RV solar panel setup can save you a few dollars on your solar setup.
Rigid vs Flexible Solar Panels

One last kind of solar panel is the flexible solar panel also known as a “thin-film” panel. Your “classic” RV solar panels are hard and rigid. Just like the name says, flexible solar panels can be bent into (almost) any shape or position.
The flexible nature makes these RV solar panels great for all kinds of applications. Plus, they’re much easier to install because you can use an adhesive. With rigid panels, you have to drill holes.
The big drawback of flexible panels is their low efficiency. Rigid panels – monocrystalline and polycrystalline – will have an efficiency somewhere between 13-20%. Meanwhile, flexible panels, are only 7-15% efficient.
Another potential problem is that flexible panels are more prone to damage. For example, driving through a wooded area and hitting a stray tree branch could scratch through the panel. You have to be a little more careful with flexible panels.
The big upside of flexible panels is their flexibility. And not just the literal kind; a flexible solar panel can be used in lots of situations where a rigid panel might not work as well. For example, attached to the curved side of a teardrop camper.
Roof Mounted vs Portable RV Solar Panels
When you think of RV solar panels, you probably think about them being permanently installed on the roof of a motorhome or travel trailer. But did you know that there are solar panels you don’t have to install?
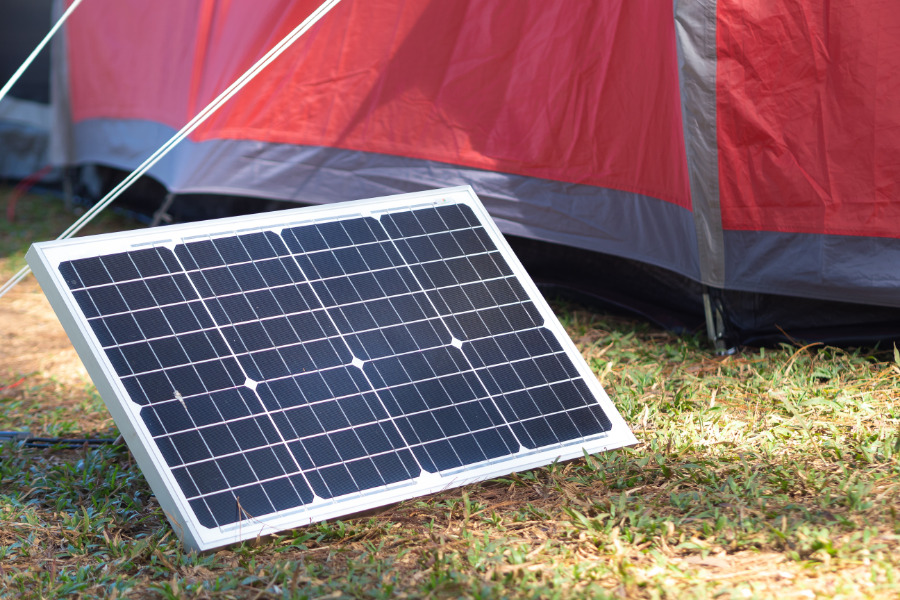
Enter the portable RV solar panel. Rather than being permanently attached to your RV, these solar panels fold up for storage when they’re not in use. When you get parked at your sunny destination, you simply pull them out and attach them to your battery whenever you need them.
Portable solar panels have a bunch of advantages:
- There is no need for installation which can involve hours of hard work
- You don’t have to worry about where your RV is parked; the solar panel can be moved for the best sunlight
- Portable solar panels are often more affordable than a full, RV rooftop solar install
However, there are some drawbacks to portable solar panels too:
- You’ll need space to store your panel when you’re not using it
- Every time you need to power up your battery, you have to take out the portable panels and set them up
- If you’re RVing in a shaded area, you might have to move the panels throughout the day to chase the sun
- If you need a lot of power, portable panels might not be sufficient
Portable RV solar panels might not replace a full rooftop array of solar panels but they’re a great (easy) way to get started with solar power.
How Many Solar Panels Do You Need to Run An RV?
You’re probably wondering, how many solar panels you’ll need for my RV? The exact number depends a lot on the panels you’re using and your power needs. Some people might only need one or two panels, but others will need six or more!
An important thing to remember is it’s not really the number of panels that matter – it’s the number of watts. Three 100-watt panels are the same as one 300-watt panel. So, what you really want to know is how many watts you need.
You’ll notice when you look at RV solar panels that they all have a certain wattage rating. Your average RV solar panel is rated between 100 and 400-watts. You can find higher and lower ratings too.
To put it simply, more watts mean more power. Keep in mind that these ratings are under ideal conditions. Your RV solar panels will give you less power if it’s not a perfectly sunny day or if it’s under shade.
But wait, then how many watts do you even need? There are two main ways to calculate your power needs.
Calculating How Many Solar Panels Does an RV Need?
When calculating how many solar panels your RV needs, the best option is to do a power audit. This means calculating how much power everything in your camper is consuming.
Method 1: Boondocking
The best way to calculate your power needs is to spend some time boondocking. With this method, you can see just how much power you’ll need in a real-world scenario (Plus, you can cut loose off-grid and take a probably much-needed break).
Take your RV out and go for a camping trip, using everything as you normally would. Be sure not to use a generator. During the trip, you can track how long it takes you to drain your batteries.
To track your charge level, use a battery monitor or multimeter. If yours doesn’t display the battery level, you can calculate it using the voltage readout. When the voltage readout shows about 12.2-volts, your batteries are around 50% discharged.
To get the most accurate values, it’s helpful to take multiple trips. That way you can get a good average of your power consumption.
How to Calculate Battery Capacity
Battery capacity is measured in amp-hours or Ah.
For this example, let’s say you have 200Ah of usable battery power.
If you used 50% of the capacity in 20 hours, that’s 5Ah per hour (50% of 200= 100. 100Ah divided by 20 = 5Ah). Then multiply this by 24 hours to see a full day’s use: 5Ah x 24 hours = 120Ah per day.
As a general rule of thumb, a 100-watt solar panel will give you 30 amp-hours a day. So in order to get 120Ah per day (the amount of power calculated you need per day), you’d need at least 400-watts of solar panels.
Method 2: Adding up Your Electronics
Another way to estimate your power needs is by adding up the power you’ll consume every day through the electronic devices you commonly use. This is a more time-consuming method and not as accurate. If you can’t take your RV out boondocking then it might be your only option.
There are plenty of wattage worksheets and tools online to help you calculate your power consumption. Parked in Paradise has a comprehensive version that accounts for how much power you have coming in and the devices you use. It’s fully interactive, so you can just input the information and it will give you the numbers. Whatever worksheet you use, the general process is the same.
You’ll want to round up all the electronics in your RV and put them on the list (ex. your coffee maker, hairdryer, air conditioner, fans, laptop chargers, etc.). Then you’ll need to find the wattage of each device. This information should be written somewhere on the device or its power source.
Once you have the wattage, you’ll need to estimate how many hours a day you’ll use each device. Then fill in the worksheet with this information. You’ll also need to know if the device runs off AC or DC power.
Once you’ve input everything, most worksheets should do the math for you. Viola! You’ll know how much power you need in a day.
From here, matching the solar panels is the same as before. A 100-watt panel will give you about 30 amp-hours per day. So, for every 30-amps consumed, you’ll want another 100-watts of power.
What Other Components Do You Need for an RV Solar Panel System?
There are other components you’ll need for your RV solar panel system. So far, you’ve figured out how many RV solar panels you need and decided what type of panel you want. Getting the energy to the house batteries requires additional equipment.
You need somewhere to store electricity (your house batteries) and something to control charging (the aptly named charge controller). And if you want to power 120v AC devices, you’ll also need an inverter.
Battery Bank
While the RV’s solar panels make the electricity, house batteries (not the engine battery) are what actually powers your motorhome and the electronics. All the batteries together are referred to as your RV’s “battery bank.” There are two different kinds of batteries used in RVs: lead-acid and lithium batteries.
Lead-acid batteries are cheaper, but they’re also less efficient. You can only discharge them to about 50%. They also need to be replaced every few years (more frequently if you habitually discharge them below 50%).
There are a few different kinds of lead-acid batteries, but absorbed glass mat (AGM) batteries are usually the best choice. Deep-cycle or marine-grade AGM batteries are specifically designed to work as house batteries. These batteries can be discharged the most, last the longest, and don’t require any maintenance.
Lithium-ion batteries are pricier, but they’re more than worth it. These batteries can be discharged almost completely and can last up to 10 years before needing replacement.
Your RV is probably already equipped with a battery bank. But it might be worth considering an upgrade. Upgrading to lithium and/or adding more batteries can give you more power and let you stay out boondocking for longer.
RV batteries will have an Ah rating showing how much power they can supply on a single charge. Adding together the amp hours of all your batteries will tell you how much power you can draw before needing to recharge them. When combining batteries, always make sure they’re the same type.
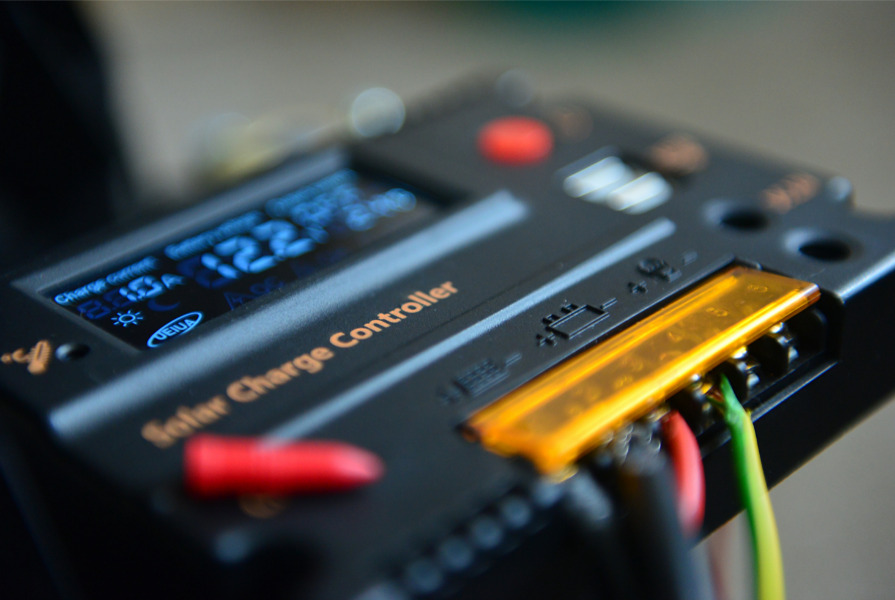
Charge Controller
You can think of the charge controller as the “brains” of your solar setup. It takes the high voltage coming from your RV solar panels and throttles it down to something your RV battery can actually use. The charge controller also ensures your batteries get charged properly and don’t get damaged.
There are two different kinds of charge controllers:
- Pulse width modulation (PWM)
- Maximum power point tracking (MPPT)
PWM controllers are more affordable, but they’re also less efficient. A PWM controller is really only recommended if you have a smaller setup (200-watts or less).
MPPT charge controllers are the more efficient option. With an MPPT controller, you’ll always get the perfect charge. They’re well worth the investment and if you have a larger system, you definitely want an MPPT charge controller.
When you’re picking a charge controller, you’ll also need to match it to your solar panels and batteries. The exact process depends on what type of controller you choose. Thankfully, Renogy has a great guide to choosing your charge controller.
Inverter
With solar panels and a charge controller, you can charge your batteries. But you’ll need an inverter if you want to power most of your electronics.
But why can’t I just run my electronics off the battery? Because the power coming from your battery is 12 volt DC (“direct current”). Many components in your RV, like lights and the 12v fridge, can use that 12v DC power without a problem. But other devices, like TVs, phone chargers, and coffee makers need to use 120-volt AC (“alternating current”) power. Simply, an inverter takes your battery’s 12v DC power and “inverts” it into 120v AC.
When choosing an inverter, you’ll need to know how many watts of power your electronics consume in a day. Then add 15% to have a bit of a safety buffer and find an inverter that’s rated for (at least) that number of watts.
When you’re looking at inverters, you’ll see “modified sine wave” and “pure sine wave” inverters. Modified sine wave inverters are less expensive than a pure sine wave. But if you want to power modern electronics like TVs, laptops, and phones, you’ll need a pure sine wave inverter.
How to Install Solar Panels on Your RV Camper
Installing solar panels on your RV camper has four main steps:
- Mount your RV solar panels
- Run your wires
- Connect the charge controller
- Install your inverter (if needed)
We’ll go over the basic process for each step. But keep in mind that this is just a general guide. Every part of your solar system should come with installation instructions; you should always read and follow them closely. Consult with a professional if you need help.
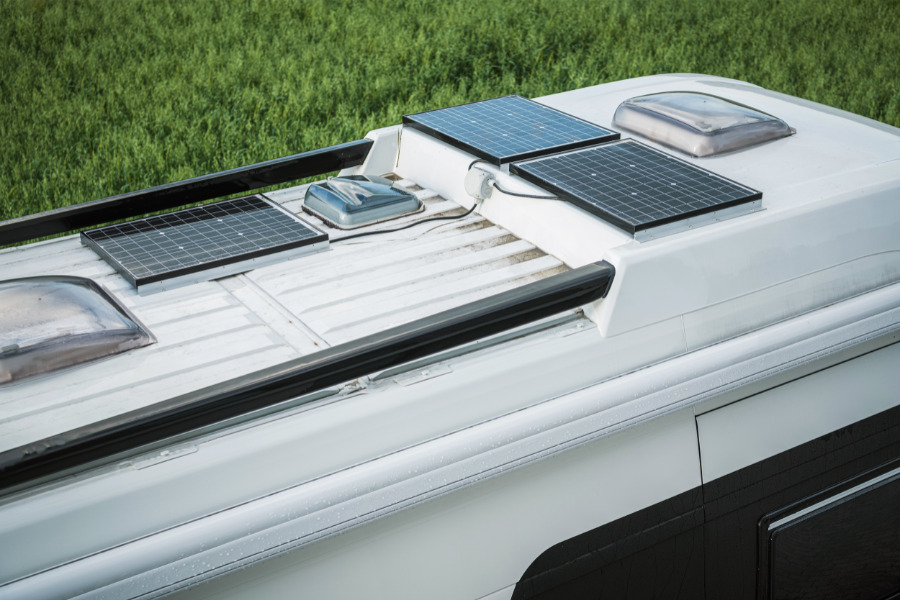
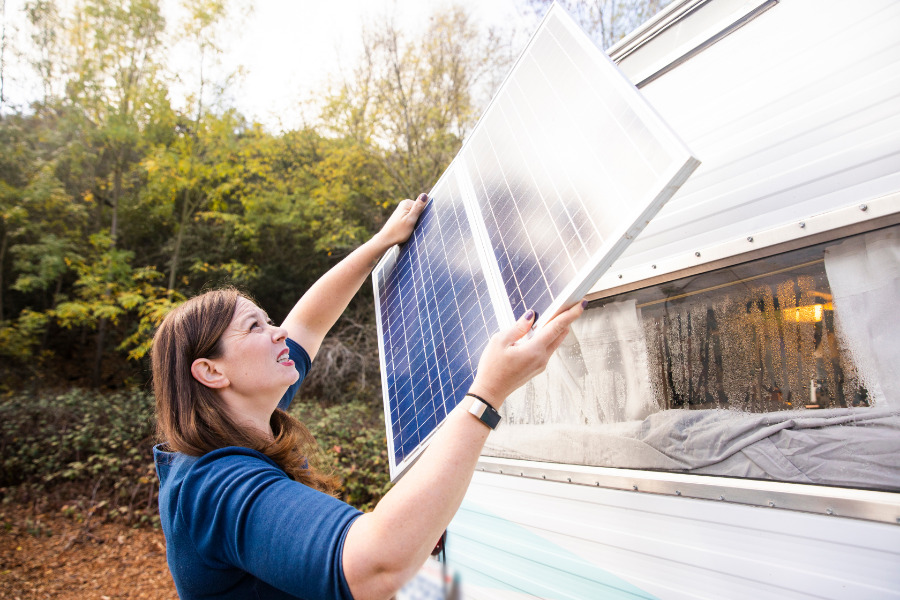
Step 1: Mounting Your Solar Panels
Before installing anything, you should measure, plan, and mark out the space where you’ll install your RV solar panels. It’s a good idea to also arrange the solar panels on the roof before doing any installation. That way, you can make sure everything fits properly.
When planning the layout of your solar panels, make sure they won’t get shaded by things like air conditioners or other components on your RV roof. If they aren’t exposed to full sun, your panels won’t be able to perform at maximum efficiency.
Once you’ve got everything planned out, it’s time to install.
If you’re using flexible panels, you can attach them with screws or an adhesive. This is as simple as cleaning your roof and carefully sticking your panels on with the adhesive. If you screw them in, remember to use some sort of waterproof seal to prevent moisture from getting through the hole the screws are using.
For rigid panels, you’ll have to attach them to the roof with brackets. In most cases, this means you’ll have to do some drilling. If it concerns you out to drill holes into your RV roof (and that’s normal), there are no-drill brackets that use an adhesive instead.
There are also brackets that will allow you to rotate your panels to meet the sun for maximum power converting abilities. These are pricier but can help you maximize your solar efficiency.
If you’re going to drill, make sure you carefully mark everything first. Attach the brackets to the RV solar panels first and then use them as a guide. Keep your RV roof watertight by applying sealant below the bracket to create a watertight seal.
Step 2: Running Your Wires
After mounting your new panels, you’ll need to wire your RV solar panels to your charge controller and the charge controller to the battery bank. The provided wires on solar panels are commonly too short for this. So you’ll need what’s called an “MC4 connector” to extend your cables.
To connect the wires to the charge controller, you’ll need to get the wires inside your RV.
The best and easiest option is to run them through your refrigerator vent. This way you don’t have to put any extra holes in your RV. You can also use any pre-existing holes where plumbing enters the RV. Check your owner’s manual; some of today’s motorhomes and travel trailers come prewired for RV solar systems, so the wiring may already be in place.
If the refrigerator vent or plumbing lines aren’t an option, you’ll need to pull out the drill again and make an entryway for the wires. Consider doing this above a cabinet or interior wall so you can hide the wiring.
Before wiring everything up, it’s a good idea to have a wiring diagram. You can draw this up yourself. Another option is using one of these wiring diagrams from EXPLORIST.life to get you started.
Step 3: Connecting Your Charge Controller
Next, you need to connect to your charge controller. You’ll want to mount your charge controller as close to your battery bank as possible. This minimizes the voltage drop over the length of the wire and ensures your batteries get enough juice to charge.
Once your charge controller is mounted, it’s time to connect your wires. Make sure to follow the instructions provided with your charge controller. Some might recommend connecting the solar panels first, while others recommend connecting the batteries first.
Make sure to clearly mark the polarity of your wires (red=positive and black=negative). (You can test them with a multimeter.) Then connect everything according to the instructions.
If you’ve done everything correctly, you shouldn’t see any flashes or sparks. Hurray! Your batteries can now be charged with the power of the sun!
If you want to use your 120v devices, you’ll need to do one more thing: install an inverter.
Step 4: Installing Your Inverter
Your inverter will take the power from your batteries and make it usable by most of your electronics.
There’s a decent chance your RV already has an inverter. It’s not strictly a part of your solar system, but you’ll need one if you want to get the most out of your new RV solar panels.
Your inverter connects directly to your batteries and should be installed close to them. Just like with everything else, you should carefully follow the instructions for installing your inverter. The basic process will look like this:
- Attach the positive and negative wires to the inverter
- Connect the negative side to the battery posts first
- Connect the positive side
Once everything is attached, you’ll be able to use your inverter to power all your 120v AC devices.
RV Solar Panel Wiring: Series vs Parallel
When you’re wiring multiple solar panels, you’ll have to decide if you want to wire them “in series” or “in parallel.”
In Series Wiring
In series means that the positive terminal of each panel connects to the negative terminal of the next, one after the other.
When solar panels are wired in a series, you get a higher voltage because the voltage of each panel is combined. For example, if you have three 18-volt panels, you’ll get 54-volts in optimal conditions.
This is important because your batteries will need a certain voltage in order to charge. For example, this BattleBorn LiFePO4 battery needs at least 14.2-volts. If the voltage drops below this value, the batteries won’t charge.
Wiring in series has a major downside though. If shade covers just one panel in the series, it reduces the power output from every other panel along with it. When wiring in series, every panel is important.
In Parallel Wiring
To wire the panels in parallel, you connect all the positive terminals together, then do the same with the negative terminals.
When you wire in parallel, the output voltage for all the panels is the same as a single panel. So, you could have eight 18-volt panels and the output would still be 18-volts.
However, solar panels wired in parallel are less affected by shade. Because they can operate independently, if one panel goes down, the rest will continue to work just fine.
It’s worth keeping in mind, however, that when wiring in series, you have a lot more voltage to spare. With only 18-volts, you need at least 80% efficiency to charge your batteries. But with the 54-volts from our series example, you could charge the batteries at only 30% efficiency.
Those that have 30-amp RVs may want to choose parallel wiring. Your electrical system might not handle the higher voltage that series wiring offers. Consult with a professional before you get started to avoid damaging your RV’s electric system.
One last thing to consider is your charge controller. If you have a PWM controller, it’s recommended you connect your panels in parallel. But with MPPT controllers, in series is better.
What Are The Benefits of an RV Solar Panel System?
There are a ton of benefits to having an RV solar panel system!
Solar Energy is Eco Friendly
Solar power is a clean, renewable energy source. You’re taking just a little bit of the massive amount of power generated by the sun (384.6 septillion watts!) and putting it to use.
Your other options for electricity in an RV aren’t nearly as good for the Earth. Shore power overwhelmingly comes from fossil fuels (about 60%). A generator also requires you to burn fuel (gas, diesel, or propane), creating emissions. But with solar panels, you can rest easy that your electricity is 100% eco-friendly.
You Can Go Anywhere and Still Have Power
With solar panels on your RV, as long as there’s sunlight, there’s power. You’ll be able to really get away and get the most out of secluded spots. If you enjoy boondocking, you’ll love the freedom of solar power.
You Can Get Off The Grid For Longer
You can use a generator when boondocking, but you’re limited to how much fuel you can bring. With solar panels, the only limit is good weather. That means you can keep your batteries charged and stay off the grid for as long as you want.
Solar Panels Are Low Maintenance
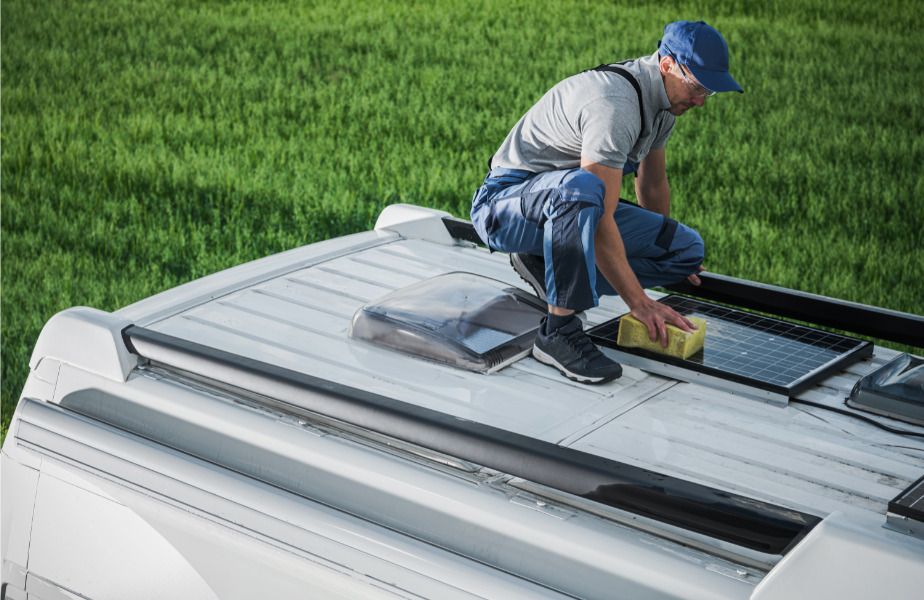
Your solar system has no moving parts and is practically zero maintenance. The only thing you’ll need to do is clean your panels every so often.
This means that once your system is installed, you’ll never have to worry about a thing. Your solar panels will keep powering your RV for years.
Solar Panels Are Completely Silent
Ah, the sound of silence.
Even the quietest generator is going to make some noise. This can be frustrating for you and anyone near your RV. And in some places, such as state parks, you can only use your generator at certain times.
But you’ll never have to worry about noise pollution with solar panels. They don’t make a sound; you’ll barely even notice they’re there!
It’s Easy to Upgrade Later
Want to upgrade to a solar system, but don’t have a big budget? No worries! A solar system is easy to upgrade further down the line.
Whenever you’re ready to upgrade an existing system, all you’ll have to do is add more solar panels and redo the wiring. Then you’ll be able to enjoy even more solar power from your panels.
How Much Does RV Solar Power Cost?
Get out the checkbook. There’s a huge price range for RV solar power systems. The price will depend on a few things like:
- The amount of wattage output of your solar panels
- Type of charge controller (PWM vs MPPT)
- Your existing battery bank (if installing new batteries or upgrading your existing ones)
- DIY installation vs professional installation
For a small, DIY solar system, you could get it done for around $600 or maybe even less. But for a larger system, especially with a professional install, you’ll probably spend anywhere from $2,000 to upwards of $5,000. An especially powerful solar system could even cost more than $10,000.
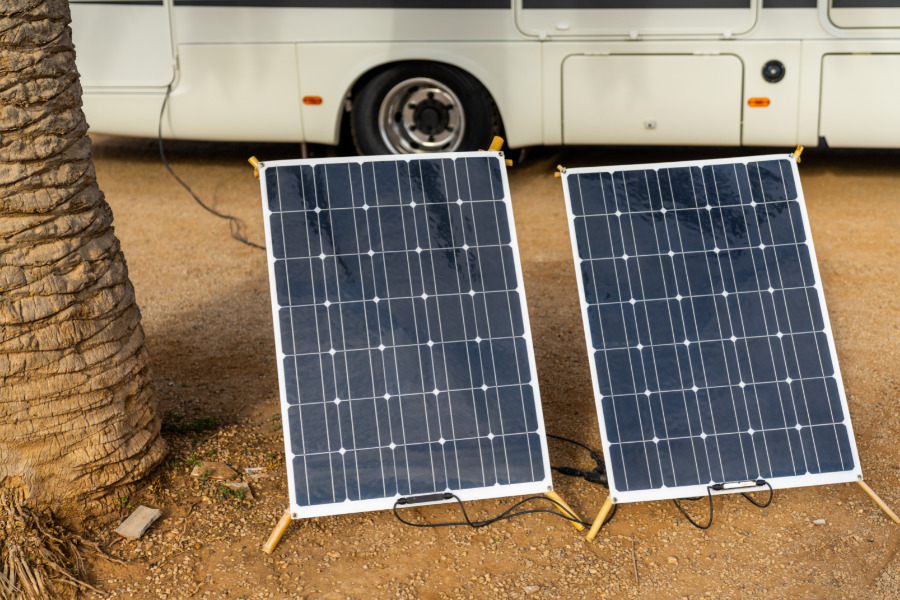
One option for those trying to save money is a portable solar panel. A portable solar panel with a charge controller can be purchased for between $200 and $350. These won’t replace a full solar system, but it is a great budget option to get you started.
Are RV Solar Panel Kits a Good Idea?

RV solar panel kits will include everything you need for a solar power system (except the batteries). With a kit, you won’t have to worry about choosing all the different parts of your solar setup. Panels, a charge controller, wires, brackets, and sometimes even an inverter will be included.
Because of this, RV solar panel kits aren’t just a good idea, they’re a great idea! Take the guesswork out of your solar setup. With a kit, you can be sure all the different parts will work together. And you can save time because you don’t need to select everything individually.
Our Top RV Solar Panel Recommendations
Here are our top RV solar panel recommendations to help you navigate through all of the options.
Renogy 200-Watt Monocrystalline Solar Panel
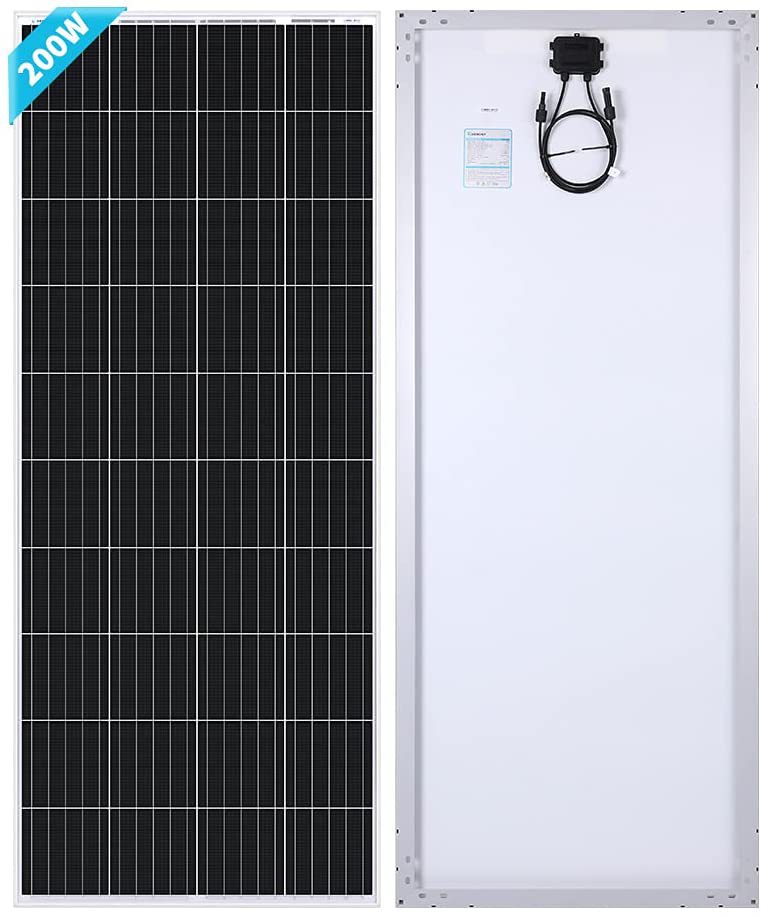
Renogy is one of the biggest names in solar power. They’re well known for their durable, high-quality solar panels. That’s why we recommend their 200W 12V monocrystalline solar panel as a great foundation for a powerful solar system.
This solar panel is nice and sturdy. They’re designed to resist high winds, snow, and rain. Plus, they have a 25-year warranty that guarantees the panels will maintain 90% efficiency after 10 years and 80% after 25 years.
If you need a smaller panel, Renogy’s 100-watt panel is also a great choice. Renogy also sells full solar kits, like this solar panel kit that includes a 100-watt panel, charge controller, cables, and mounting brackets.
Renogy 175 Watt Flexible Monocrystalline Solar Panel
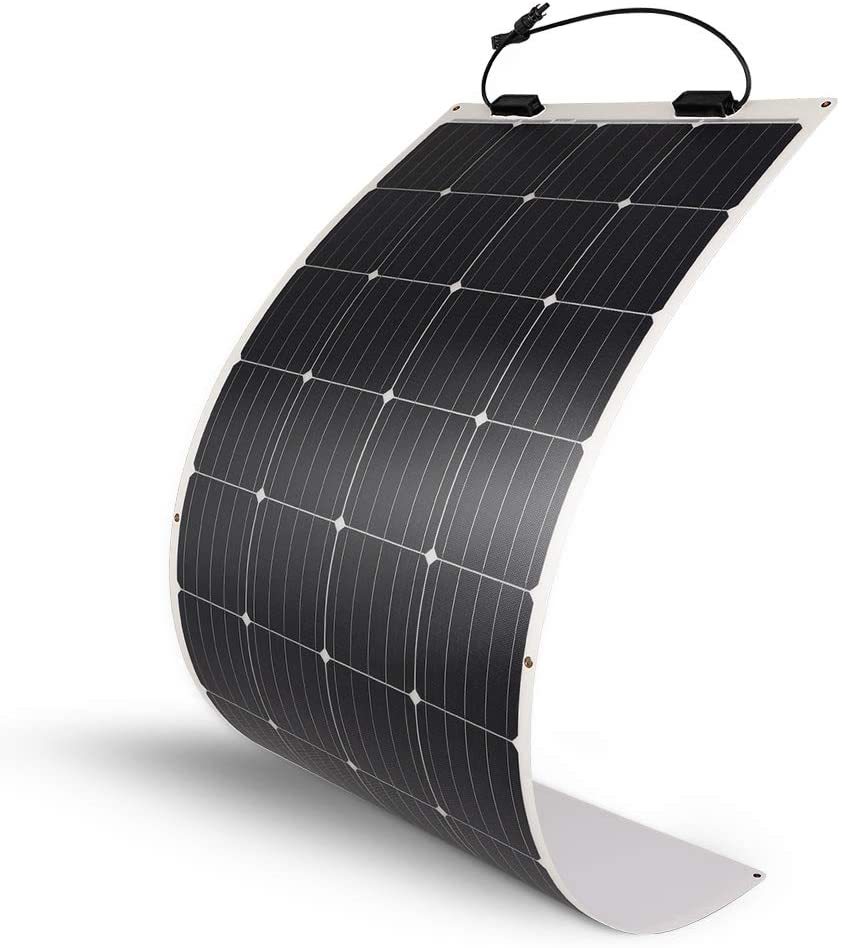
If you need a little flexibility, we recommend Renogy’s 175-watt flexible monocrystalline panel. Just like Renogy’s rigid panels, this flexible panel is powerful, sturdy, and long-lasting. It’s also super lightweight (only about 6 pounds) and slim (only 1/10th of an inch).
Renogy also makes 50-watt and 100-watt flexible solar panels. And of course, they also sell kits with everything you need, like this 100 watt kit.
Windynation 100 Watt Polycrystalline Solar Panel
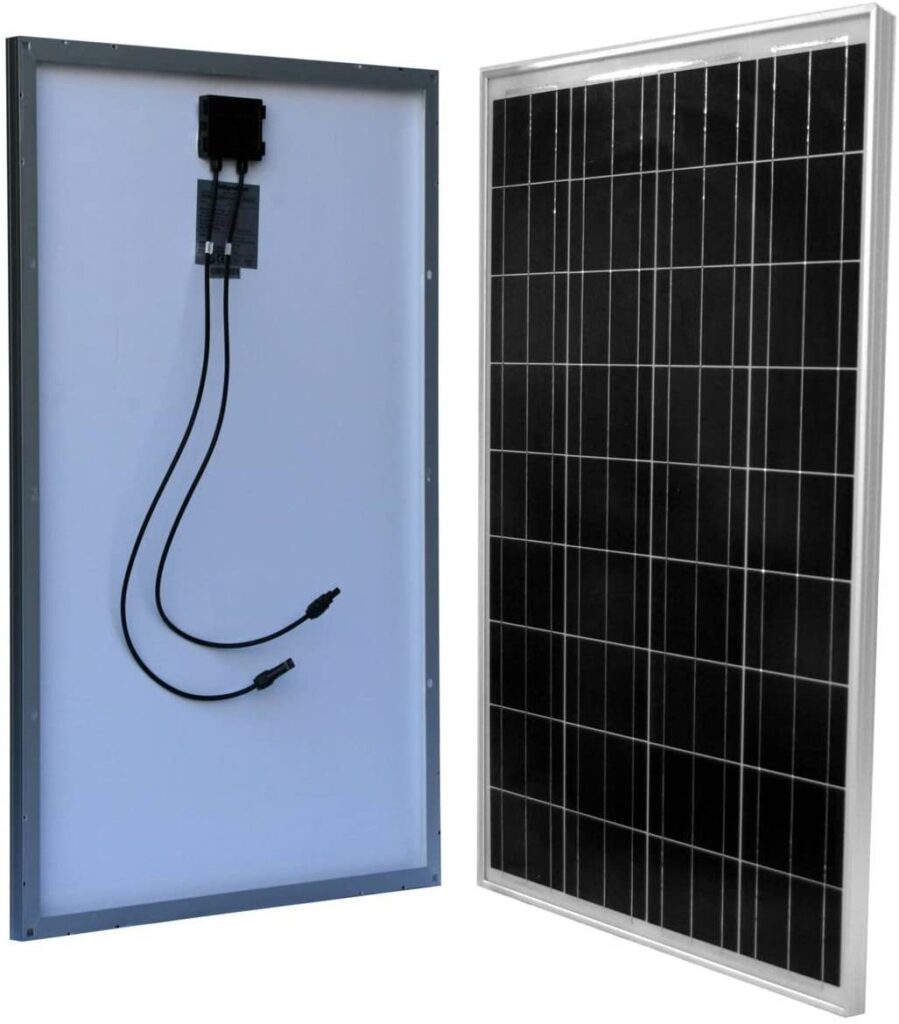
Polycrystalline panels aren’t quite as efficient but they’re more affordable. This 100 watt polycrystalline panel from Windynation is highly recommended for a less expensive solar build.
The Windynation panels are highly rated and sturdy. Plus they’ve got a 5-year warranty for parts, labor, and a 25-year power warranty.
HQST 100W Polycrystalline Solar Panel
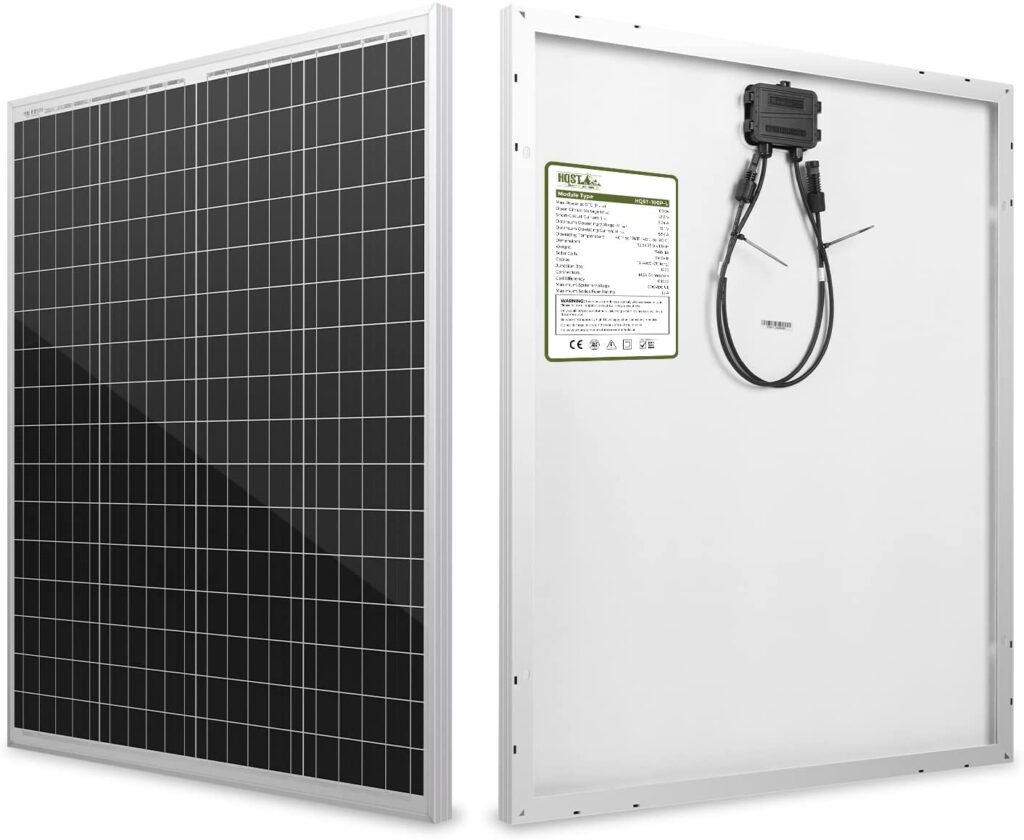
Another great budget option is the HQST 100-watt polycrystalline solar panel. They’re one of the most affordable solar panels you’ll find, but they don’t sacrifice quality.
These panels are waterproof, sturdy, and designed to withstand the elements. At only 14 pounds, they’re also fairly lightweight.
Renogy 100 Watt Monocrystalline Foldable Solar Suitcase

If you want a portable solar solution, we recommend the Renogy 100-Watt Monocrystalline Solar Suitcase. This foldable solar panel comes equipped with a charge controller and a protective case. Just unfold it, attach it to your batteries, and you’re ready to go.
Just like Renogy’s other panels, these are heavy-duty and fully waterproof. If you need more power, they also make a 200-watt version.
Are RV Solar Panels Worth It For You?
RV solar panels can be worth it for you and there are a ton of great reasons to install them on your RV. It’s a clean and quiet source of energy that gives you freedom from shore power and fuel sources. But, are they right for you?
Of course, it’s going to depend on your situation. If you only take your RV out for a few days at a time, it might not be worth investing in a full solar setup. The same is true if you mostly stay at RV parks and don’t care about going off-grid.
Solar panels aren’t cheap, and installing them means hard work (or paying someone to do the work for you). If you’re on a tight budget, you might want to hold off on making the jump to solar.
On the other hand, if you think you’re ready to take advantage of solar panels, then it’s well worth the investment. If you want to go farther and stay out longer in your RV, you’ll love the freedom solar power gives you. For those that want to get serious about boondocking, solar panels are a must-have power source.
In fact, even if you’re on a budget or don’t need a lot of power, there are still solar options for you. Portable solar panels are a great and super easy solar solution that’s usually cheaper than a full setup. And flexible panels are also a great choice because they’re both cheaper and easier to install.
It’s Time to Harness The Power of The Sun!
If you want a flexible and eco-friendly power source you can use everywhere, it’s hard to beat solar. Solar panels let you harness the sun’s natural energy to charge up your batteries, anywhere you go.
Flexibility and freedom are huge reasons that adding solar panels to your RV is so popular. With solar power, you’ll be able to really get away and you won’t have to worry about finding a shore power hookup. As long as the weather is good, you’ll be able to keep your batteries charged indefinitely.
Solar panels are a bit of an investment, but they’ll let you truly maximize your RVing experience. With solar power, there’s no limit to where you can go!
Related Reading:
– Can Solar Panels Really Power an RV Air Conditioner?
– Do You Need an Inverter to Run a 12v RV Fridge?
– RV Boondocking Beginner Tips and “How-To” Guide
– Do I Need a Battery for My Travel Trailer?
– Green RVing: Sustainable Tips For RVers
Jennifer and Kendall are avid RVers and part-time van lifers who share their years of experience both as full-time RVers and nomads through writing.
Jenn and Kendall have explored Canada, the USA, and Mexico while RVing and living full-time in all 3 countries.
They have been fortunate to work not only as part of the RVBlogger team but also with RVLife, DIY RV, Camper Report, RV Magazine, Rootless Living, Vanlifers, and more.
They have also shared their RV experience through DashboardDrifters.com and are the founders of RVSpotDrop, a web service for full-time RVers.

Super useful and also well explained Many thanks.