
Thanks for your support! If you make a purchase using our links in this article, we may make a commission. And, as an Amazon Associate, I earn from qualifying purchases. See the full disclosure here.
Fall is the perfect time to give your RV one last thorough inspection before winter storage. A little maintenance now can help you avoid frozen plumbing, damaged batteries, water leaks, and unwelcome surprises when camping season returns.
This checklist starts with travel trailers and fifth wheels, then provides a separate motorhome add-on checklist for Class A, B, and C owners. You can work down the list and check off each job as you go. Not every RV is equipped the same way, so keep your RV and appliance manuals handy.
When Should You Prepare Your RV for Winter Storage?
Start before the first hard freeze, and ideally while you still have a mild, dry day to inspect the roof and exterior. Any RV that may experience freezing temperatures needs its plumbing protected—even if you’re storing it somewhere that usually has mild winters. The steps below assume the RV will be parked and unused for an extended period.
Travel Trailer Fall Maintenance Checklist
These are the core tasks for a conventional travel trailer or fifth wheel. Motorhome owners should complete the applicable items here too, then continue to the engine and chassis checklist below.
1. Inspect the Roof, Seals, and Exterior
☐ Inspect the roof membrane, seams, sealant, vents, skylights, and air-conditioner openings for cracks or damage.
☐ Check window, door, compartment, and exterior-light seals; repair with sealants approved for your RV’s materials.
☐ Look for soft spots, staining, loose trim, or signs of water intrusion inside and out.
☐ Wash and dry the exterior, clean awning fabric, and retract the awning fully after it dries.
☐ Inspect the underbelly for loose panels, exposed wiring, damage, and possible pest entry points.
Why it matters: A tiny roof leak can become a major repair after months of rain, snow, and freeze-thaw cycles. Use safe roof-access practices; some RV roofs are not designed to support walking.
2. Winterize the Plumbing System
☐ Turn off the water heater and let it cool before draining or servicing it.
☐ Disconnect city water; drain the fresh tank, low-point drains, and the gray and black tanks, and flush the black tank as directed.
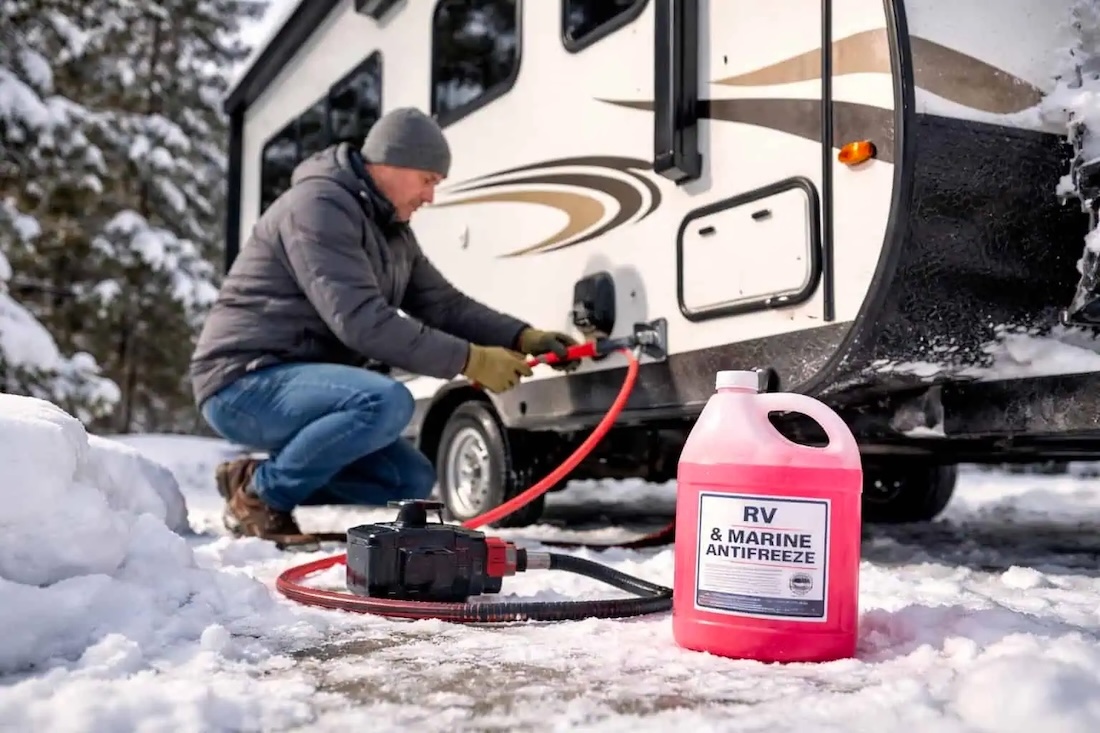
☐ Follow the RV manufacturer’s winterization method: properly drain/blow out plumbing where allowed and/or pump non-toxic RV/marine plumbing antifreeze through the system.
☐ Protect every water fixture, including indoor and outdoor showers, kitchen and bath faucets, toilet valves, sprayers, washer hookups, and an ice maker if equipped.
☐ Add appropriate RV antifreeze to sink and shower drain traps and protect the toilet seal according to the manual.
☐ Winterize the water pump, filters, water heater, and any special appliances according to their specific instructions.
Important: Never use automotive antifreeze in the drinking-water system. Traditional tank-style and tankless water heaters can require very different procedures. In particular, tankless RV water heaters require special winterization attention; do not assume that bypassing one protects it. If using compressed air, follow the lowest pressure limit specified by the RV or appliance manufacturer.
3. Check the Tires, Wheels, Hitch, and Running Gear
☐ Inspect tire tread, sidewalls, valve stems, and tire age; address damage before the next trip.
☐ Inflate cold tires to the appropriate manufacturer/load-based storage pressure without exceeding the tire or wheel limits.
☐ Inspect brake wiring, breakaway switch, safety chains, hitch coupler, and seven-way connector.
☐ Review bearing lubrication, brake service, suspension, and wheel fastener service due under the manufacturer’s schedule.
☐ Park on a firm, well-drained surface, use wheel chocks, and protect tires from direct sun when practical.
Don’t rely on stabilizer jacks to support the trailer’s weight. Follow the owner’s manual for tongue jack, landing gear, leveling system, and long-term storage positioning.
4. Protect Batteries and Electrical Components
☐ Fully charge the house battery and follow its chemistry-specific storage instructions.
☐ Use a compatible, properly configured maintainer where appropriate; otherwise disconnect/remove the battery as directed and check its charge periodically.
☐ Pay special attention to lithium battery low-temperature charging restrictions and manufacturer-recommended state of charge.
☐ Switch off unnecessary 12-volt loads, disconnect power as appropriate, and inspect the shore-power cord and plug.
☐ Check smoke, carbon monoxide, and propane alarm replacement dates and replace batteries where applicable.
A battery disconnect switch does not always eliminate every parasitic draw. Verify how your RV is wired before assuming its battery can sit unattended for months.
5. Secure Propane, Appliances, and the Interior
☐ Turn off propane cylinder valves and inspect hoses and regulator condition; do not leave fuel-burning appliances running unattended.
☐ Empty, defrost, clean, and dry the refrigerator; leave its doors propped open as its manufacturer recommends.
☐ Remove food, pet treats, toiletries that might freeze, and anything likely to attract rodents.
☐ Clean the kitchen, upholstery, and floors; dry wet areas and use an appropriate moisture-control strategy.
☐ Inspect accessible vents, openings, and utility penetrations for gaps; close them without blocking required appliance ventilation.
☐ Clean and dry slides and seals, retract slides for storage unless your manual says otherwise, and check the slide roof for debris.
Mice can do expensive damage to wires and upholstery. Sealing gaps and eliminating food sources are much more dependable than counting on scented dryer sheets.
6. Final Travel Trailer Storage Walk-Through
☐ Record photos of the roof, walls, tires, and interior condition before storage.
☐ Remove valuables and sensitive electronics.
☐ Close windows, roof vents, and doors; lock storage compartments.
☐ Check the storage site’s drainage, security, snow exposure, and access requirements.
☐ Use only an RV-compatible breathable cover if desired, secured so it won’t rub or block required ventilation.
☐ Set reminders to inspect the RV periodically for leaks, pests, storm damage, tire condition, and battery status.
If you want a deeper explanation of the overall storage process, also read our 10 Things I Do Before Storing an RV for Winter.
Motorhome Fall Maintenance Checklist: Additional Tasks
If you own a Class A, Class B, or Class C motorhome, do the applicable RV house items above plus these extra jobs. A motorhome has an engine, chassis, and often an onboard generator that need protection during inactivity.
7. Service and Protect the Engine and Fuel System
☐ Check engine oil, coolant concentration, belts, hoses, fluid levels, filters, and any maintenance due before storage.
☐ Follow your chassis/engine manufacturer’s recommendations for fuel storage, fuel treatment, and tank fill level. Gasoline and diesel engines may require different approaches.
☐ Check for leaks beneath the motorhome and repair active leaks before storage.
☐ Confirm engine air-intake, exhaust, and accessible compartments are free of nesting material; use only safe, manufacturer-approved pest protection.
Don’t assume every motorhome should receive the same fuel stabilizer. Some diesel engines, modern emission systems, and fuel types have specific requirements.
8. Maintain the Generator
☐ Check generator oil, filter, coolant (if applicable), and service schedule.
☐ Follow the generator manufacturer’s instructions for fuel treatment and storage.
☐ Follow the manufacturer’s exercise schedule or long-term storage procedure; never run a generator in an enclosed storage building.
☐ Inspect the generator compartment for debris, leaks, and signs of rodents.
9. Protect Chassis Batteries, Tires, and Brakes
☐ Fully charge and maintain both chassis and house batteries separately according to their battery types and charging systems.
☐ Inspect all motorhome tires, including inner duals, and verify pressure against the chassis/tire manufacturer’s load guidance.
☐ Review chassis lubrication, air systems if equipped, brake fluid/air system service, and manufacturer storage procedures.
☐ Use appropriate wheel chocks and the manufacturer-recommended parking-brake procedure for long-term storage.
☐ If the motorhome has hydraulic leveling jacks or air suspension, follow the chassis/leveling-system instructions for extended parking.
10. Don’t Forget Motorhome-Specific Equipment
☐ Check windshield seals, wipers, washer fluid freeze protection, and cab-door seals.
☐ Inspect engine and cab HVAC air inlets for debris and possible rodent access.
☐ Check diesel exhaust fluid (DEF) storage guidance if equipped; avoid contamination and follow vehicle recommendations.
☐ Inspect towed-vehicle connections, tow bar, baseplate, braking equipment, and cables if you tow a car.
Some owners start and idle their engines occasionally during storage. That is not a substitute for the engine manufacturer’s storage instructions; short idling sessions may not warm the engine and exhaust sufficiently. Follow the chassis manual rather than a generic routine.
Common Fall RV Storage Mistakes
The most expensive oversights are usually simple ones: forgetting an outdoor shower or tankless water heater, storing the RV with an uncharged battery, overlooking roof sealant, leaving food inside, or parking on ground that doesn’t drain. Take your time with the checklist and keep a record of what you’ve completed.
Frequently Asked Questions
1. Do I need to winterize my RV if I live in the South?
If your RV could experience a freeze where it’s stored, protect the plumbing. A brief cold snap can still damage a vulnerable water line, pump, or heater. If you travel year-round and keep water systems active, winter camping requires a different cold-weather plan.
2. Should RV slides be in or out during winter storage?
Retracted is generally the more practical position for extended storage, provided it agrees with your owner’s manual. Here’s our complete discussion of whether to store an RV with the slides in or out.
3. What should I do before using my RV again in spring?
Inspect it, restore and sanitize the water system, check for leaks, test safety equipment, and verify tires, brakes, and appliances. Our RV de-winterization guide will help you get ready for that first trip.
Final Thoughts
The goal isn’t to do every possible maintenance project in one afternoon. It’s to address the problems that get worse while an RV sits: water, freezing, low batteries, rodents, and neglected mechanical systems. Save this checklist, use your manuals for model-specific procedures, and you’ll have a much better chance of pulling your RV out of storage ready for the next adventure.
Related Reading:
– How to Winterize a Tankless RV Water Heater
– Do You Have to Winterize an RV? When You Do (and Don’t)
– Indoor Versus Outdoor RV Storage Facilities
Mike Scarpignato – Bio
Mike Scarpignato founded RVBlogger.com with his wife, Susan, in 2018 to help new and experienced RVers make better decisions about buying, owning, and traveling in an RV.
Mike has decades of camping experience and has traveled extensively in both a Gulf Stream Conquest Class C and a Thor Challenger Class A motorhome. He and Susan spend much of the year on the road, attend RV shows, visit dealerships, and tour RVs across the country.
Through RVBlogger.com and the RVBlogger YouTube channel, Mike shares practical, first-hand advice about RV buying, floor plans, ownership, maintenance, gear, campgrounds, and the RV lifestyle.