Thanks for your support! If you make a purchase using our links in this article, we may make a commission. And, as an Amazon Associate, I earn from qualifying purchases. See the full disclosure here.
Many people underestimate how quickly mold forms. It travels through the air, making it especially difficult to kill. For example, touching the affected area releases mold spores, which encourages them to land elsewhere. As soon as they reach another surface, they multiply, and the problem continues. Remember, nothing will depreciate your RV faster, so read on to learn how to find and kill mold in your RV.
Preventing mold growth is the best way to avoid this situation altogether. But it is easier said than done, as mold is nearly inevitable. For this reason, it is critical to know how and why it forms. With this understanding, you can take the necessary precautionary measures and destroy mold before it starts spreading.
Although we cannot see it, mold is present just about everywhere. In search of a suitable environment, it travels through the air, clings to humans and animals, and enters buildings or vehicles through vent systems. This fungus mostly seeks out damp areas, as it requires moisture to grow. When it finds its ideal home, it lands and rapidly reproduces.
Think of it this way – your camper is continuously being exposed to humidity and precipitation. Evaporation removes these water molecules using heat (typically from the sun). When condensation occurs, the water seeps into cracks and lands in dark, inaccessible places. The same goes for those who have a leaky roof or regularly keep their rigs in shady, forested areas.
How to Find and Kill Mold in Your RV
Recall that mold loves moisture, which makes these environments especially desirable. Spores land in these damp areas and continue growing with no restraint. Nothing in the natural environment kills mold, meaning humans must use chemicals to destroy it. Instead, you must be proactive to prevent wood rot or corrosion. Therefore, the following tips will help you find and kill mold in your RV.
1. Smell the Interior of Your RV
Contrary to popular belief, mold spores themselves do not smell. Instead, the blame falls on microbial volatile organic compounds (MVOC). Interestingly, the mold’s reproduction, growth, and digestion produce stinky byproducts.
Furthermore, the odor depends on the age and species of mold. Some kinds generate an earthy, sweet, or putrid scent. However, most give off a musty or dank stench. A good rule of thumb is to check for mold if the air smells anything but ordinary.
2. Use a Toxic Mold Kit to Test the Air Quality of Your RV
Although controversy surrounds the capability of toxic mold kits, scientific and government research considers them safe and effective. They are relatively inexpensive, and you can buy them at any local hardware store. Toxic mold kits are also easy to use, as they detect mold through a “settle plate” or “gravity sample testing.” Note that you should only use this method in combination with others in the rare case it fails.
3. Visually Inspect RV for Stains
To find mold in your RV, first, use your eyes to direct you towards the root cause. Although fungus typically thrives in hidden, dark crevices, a significant infestation eventually becomes visible.
Look closely for mold in your RV camper walls, ceilings, and carpets. The affected areas will appear black, blue, green, or white. These types of stains usually indicate a roof or plumbing leak. Check the outside of your RV to find the source of the water damage.
4. Examine the Exterior
More commonly, mold forms as a result of exterior leaks, tears, or corrosion. Moisture then seeps through the electrical components, wood panels, and interior. The water encourages fungus growth within 24-48 hours, leaving you no time to reverse the process.
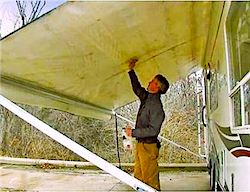 If you find stains on your ceiling, floor, or walls, check for mold on your RV roof. Study the area with detail to look for rips and breaks. Tend and treat these areas immediately to avoid further leakage.
Mold on RV awnings is also another common occurrence. The problem happens because many people keep it rolled up, giving it little exposure to the sun. Precipitation and condensation leave it damp, thus promoting fungal growth. Regularly roll out your awning to check for any discoloration or smells. Always give it ample time to dry before retracting it.
5. Check Plumbing and Appliances
Understandably, mold lurks near the plumbing pipes of your RV. Water continuously flows through this system, providing the fungus with the moisture it loves. However, do not be concerned if you use your pipes frequently and repair leaks immediately.
On the other hand, campers with loose piping suffer severe consequences from the mold. Sometimes, you only realize these leaks after it is too late. That’s why you should regularly inspect for mold in your RV fridge, air conditioner, A/C ducts, and freshwater tank.
The bathroom is the largest culprit of mold growth, as moisture here is frequent and plentiful. Steam is particularly problematic if your vent fan is not working correctly. Therefore, you should perform regular checks in and around your restroom sink, shower, and toilet.
6. Look in Hidden Areas
The fungus is rather sneaky and enjoys living anywhere that is dark and out of plain sight. As a mold expert, you must look in both apparent and nonobvious areas. Think of any place that may accumulate moisture or dampness and give it a thorough inspection.
Mold can hide beneath your dash, cabinets or storage areas, and even under your RV mattress or couch. It is persistent and forms anywhere it can, meaning you must thoroughly check every nook and cranny.
How to Kill Mold in Your RV
Always kill mold immediately after discovering it. Remember that it can be extremely toxic. Therefore, you may need to seek expert help if the infestation is widespread. Always protect yourself by wearing gloves, a mask, and long-sleeve clothes, even with smaller areas.
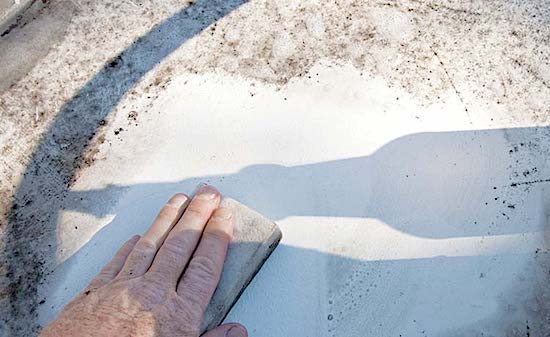
For external molds, such as that on your roof or awning, use store-brand spray. Consult with your local RV dealer or hardware store to find the right product for you. Also, keep in mind that regular washes and treatments to your RV roof are the best defense against mold.
Conversely, you can treat the internal mold using various techniques. It is especially necessary to wear a mask inside the RV to avoid inhalation of mold spores and chemicals. Open your windows and doors, as well, to promote ventilation.
Natural remedies that get rid of mold are less harsh and work well on interior mold. Pour into a spray bottle, douse the affected area, and start scrubbing. With that, here are the best homemade mold killers:
- White vinegar in a spray bottle works well and does not need dilution.
- Tea tree oil keeps spiders away and destroys the fungus. Add 10-15 drops to a spray bottle of water.
- Hydrogen peroxide (3% concentration) is an effective alternative to bleach, and you do not need to water it down.
- Distilled ethanol, or bottom shelf alcohol, does not require dilution either.
- Grapefruit seed extract is both a preventative and killer of mold. Mix 20 drops of extract with two cups of water for best results.
- Baking soda also works well for the mold smell. Add ¼ teaspoon into a spray bottle full of water.
For tougher to remove mold, bleach or ammonia are secondary options. Please note that you should never mix these two, as the combination produces a deadly, toxic gas. Either way, these chemicals need to be diluted with water (1:1 ratio), as they are quite harsh on their own. Only use bleach or ammonia on hard, non-porous surfaces. Do not use these chemicals on fabric and carpets, as they will cause stains.
Conclusion
Knowing how to prevent mold, moisture, and humidity from forming in an RV saves you time and money. Abide by these simple guidelines to give yourself the best chance against it.
First, regularly clean your roof and inspect it for leaks or tears. Repair any damages as soon as possible. Second, park your RV in an area exposed to sunlight. Avoid staying under trees that drop moisture-ridden fruit or leaves on the roof.
Next, try to limit the water molecules inside your RV. Do this by covering all pots and pans used for cooking and hang drying wet clothes outside. Be sure to open windows and use vents after showering and cooking to rid any moisture.
Install insulation around your windows to prevent water and mold particles from entering the cabin. Set your RV thermostat to a temperature less than 70 degrees to restrict growth. Also, use a dehumidifier to keep the humidity levels between 30% and 50%. Note that condensation forms when cold water molecules meet hot, humid temperatures, so be careful not to set your air conditioner too low.
Don’t let mold hinder your camping lifestyle. Instead, stick to these recommendations to take control of the issue. By doing so, you will increase the lifespan of your RV and breathe happy, knowing your lungs are free of toxins.
Do you have any suggestions about how to spot and remove mold in an RV? Please leave your comments below and help your fellow RVers!
For more related information check out some of our other articles below:
- 9 Easy Tips for Cleaning Your RV Rubber Roof
- Can I Use Flex Seal on My RV Roof?
- 7 Best Materials to Replace RV Ceiling Panels
- Homemade RV Awning Cleaner
- DampRid vs Dehumidifier – How to Reduce Humidity in an RV
- How to Clean the Outside of a Camper Trailer
- Should I Pressure Test My RV for Roof Leaks?
- 25 Essential Tips for Storing an RV in Hot Weather
- 21 Must-Have RV Accessories for a New Camper or Travel Trailer

Hello,
I own a 2009 Bighorn 34′ Fifth Wheel RV w/3 slide outs. It’s mainly stationary in 60% percent shade 40% percent sun. My priority concern is eliminating my current mold growth immediately followed up with a surefire prevention plan to ensure a mold free living area in and outside of my RV. Any advice and recipes environmentally safe for eliminating mold is greatly appreciated.
Thank you,
Allan C
Huntsville Alabama
Thinking we may have mold in the air conditioning units and or vents. There is a distinct mold musty odor when they kick on. Visually can not see anything when opening up, but I know it’s in there. Any suggestions?
Hot soapy water kills mold, bleach removes color mold leaves. Learned this at mold training.
Water condensation occurs when hot wet gasses contact cold surfaces. This is the same theory used in distillation, the hot wet gasses enter the water cooled condenser to form liquid droplets. The same for dew on your lawn in the morning, the warm moist air contacts the cool surfaces of the grass blades forming water droplets.